Cell Line Creation
Estimated time
~2 weeks for polyclonal; ~ 2 months for monoclonal
While the initial transfection does not take very long, the selection process takes a long time!
Note
These protocols are still in development! While the pDNA-based PiggyBac w/ Puromycin co-integration protocol developed by Sneha seems robust, a markerless PiggyBac protocol leveraging modRNA-based transient selection protocol is currently under exploration.
For CRISPR, Deon has developed a robust modRNA-based delivery method that is capable of single and multiplex HDR-based insertions.
For TALEN, (insert here Chris)
Each method possesses their unique cell plating, transfection, and selection timelines. After the selection period, the methods converge on universal enirichment and single-cell cloning protocols (ie., limiting dilution or cell sorting)
PiggyBac (Sneha)
Day -1
Seed your cells such that they will be around 30-40% confluent on the next day. There is an extended selection outgrowth period required, which means we should start with lower confluence. Recommended rough seeding counts are:
Cell type |
Seeding amount (per 96 well) |
|---|---|
293T |
12.5k cells |
U2-OS |
7.5k cells |
Day 0
- Follow the step for the cell line type to generate
- PiggyBac
Co-transfect the PiggyBac plasmid alongside your plasmid containing PB recognition sites at a 3:1, template:transposase mass ratio.
- Crispr
Co-transfect the Crispr/guide plasmid alongside your plasmid containing locus-specific recognition sites at a 1:1 mass ratio.
- TALEN
Co-transfect the TALEN-R and TALEN-L plasmids alongside your plasmid containing locus-specific recognition sites at a 1:1:1 mass ratio.
Note
When transfecting, leave some untransfected wells where you just add the KO-DMEM/PEI master mix, without plasmids. This allows you to tell if your selection is working as expected, and also gives you a proxy for how much PEI-mediated cell death you are seeing.
Day 1
Media change into selection media. Tested concentrations for PiggyBac are:
Cell type |
Puro |
|---|---|
293T |
1.0 μg/mL (10,000x) |
U2-OS |
0.25 μg/mL (40,000x) |
Day 2-4
Continue selecting the cells until decent cell death occurs, or the cells are too dense.
Note
Puromycin at the given concentration should decidedly kill your untransfected wells. If you do not see sufficient cell death, try using a different aliquot.
CRISPR (Deon)
Day -1
Deon recommends CRISPR at 12-well scale, as this is the smallest scale that yielded a workable number of surviving cells after multiple transfections, CRISPR genotoxicity, and drug selection. The following seeding density permits sufficient transfection efficiency while obviating the need for passaging in between pDNA and modRNA transfections:
Cell type |
Seeding amount (per 12 well) |
|---|---|
293T |
150k cells |
Day 0
Transfect the donor plasmid/s containing your cargo flanked by locus-specific homology arms. If targeting two loci, transfect each donor at a 1:1 mass ratio (1 microgram total DNA).
Note
Deon recommends the Mirus LT1 (low-toxicity) DNA transfection reagent. Avoiding PEI-mediated toxicity/cell-death is critical considering the intrinsically low efficiency of HDR-mediated CRISPR editing.
Transfect a separate well with your donor plasmids to monitor plasmid dilution/drug selection and to serve as a negative control for preliminary genotyping analysis.
Day 1
Transfect your cells with 300 ng of Cas9 modRNA and sgRNA/s for your target locus/loci at a 3:1 mass ratio of Cas9 to sgRNA. For Rogi1/2 dual targeting, the amounts are as follows:
RNA species |
Amount (ng) |
|---|---|
Cas9 modRNA |
300 ng |
Rogi1 sgRNA |
50 ng |
Rogi2 sgRNA |
50 ng |
Day 2
Depending on the health of your cells/confluency, passage onto a 6-well plate. If your cells are not ready for passaging, media change into fresh DMEM+10% FBS to remove the transfection reagents.
Day 3
If you didn’t passage on Day 2, passage today onto a 6-well. After checking cells have adhered, media change into selective media corresponding to the drug marker you’ve integrated.
Days 4-8
media change with fresh Puro-containing media daily, passaging as needed.
Note
In 293Ts, Puromycin (1 ug/mL) should decidedly kill an untransfected control well in ~72 hr. Deon has found 5 days of Puro selection sufficient to obtain a polyclonal CRISPR line.
Day 9 Remove selection and let cells recover/expand. During your next passage, take a small aliquot of cells for genotyping analysis to validate cells within your population contain the desired insertion (see “Genotyping your line”) before proceeding with single-cell cloning/downstream applications.
TALENS (Chris)
Day -1
Seed your cells such that they will be around 30-40% confluent on the next day. There is an extended selection outgrowth period required, which means we should start with lower confluence. Recommended rough seeding counts are:
Cell type |
Seeding amount (per 96 well) |
|---|---|
293T |
12.5k cells |
U2-OS |
7.5k cells |
Day 0
- Follow the step for the cell line type to generate
- PiggyBac
Co-transfect the PiggyBac plasmid alongside your plasmid containing PB recognition sites at a 3:1, template:transposase mass ratio.
- Crispr
Co-transfect the Crispr/guide plasmid alongside your plasmid containing locus-specific recognition sites at a 1:1 mass ratio.
- TALEN
Co-transfect the TALEN-R and TALEN-L plasmids alongside your plasmid containing locus-specific recognition sites at a 1:1:1 mass ratio.
Note
When transfecting, leave some untransfected wells where you just add the KO-DMEM/PEI master mix, without plasmids. This allows you to tell if your selection is working as expected, and also gives you a proxy for how much PEI-mediated cell death you are seeing.
Day 1
Media change into selection media. Tested concentrations for PiggyBac are:
Cell type |
Puro |
|---|---|
293T |
1.0 μg/mL (10,000x) |
U2-OS |
0.25 μg/mL (40,000x) |
Day 2-4
Continue selecting the cells until decent cell death occurs, or the cells are too dense.
Note
Puromycin at the given concentration should decidedly kill your untransfected wells. If you do not see sufficient cell death, try using a different aliquot.
Clonal selection or enrichment via limiting dilution
Day 5 - Week 2
Dilute cells into both 96-well plates (one per condition) and onto 24 well plates for outgrowth.
Onto the 96-well plates, hard dilute to ~2 cells per well and use 200 uL of media per well (for 40 cells per mL). The extra media ensures that the plate will not fully evaporate over the next week. If you need a very large fold dilution, it is more accurate to do this as a stepwise dilution in conical tubes (e.g. first a 1000x dilution, then another 1000x dilution).
For the 24-well plates, dilute to the following amount:
Cell type |
Seeding amount (per 24 well) |
|---|---|
293T |
5k cells |
U2-OS |
2k cells |
This reseeding should proceed for about a week, until cells finish outgrowing.
Week 2 + 1 day
After cells have adhered to the 24-well plates, switch back into selection media if some non-integrated cells are visible via microscopy, and maintain it until these cells have died off.
Week 3
At this point, you should see round colonies coming from either outgrowth condition.
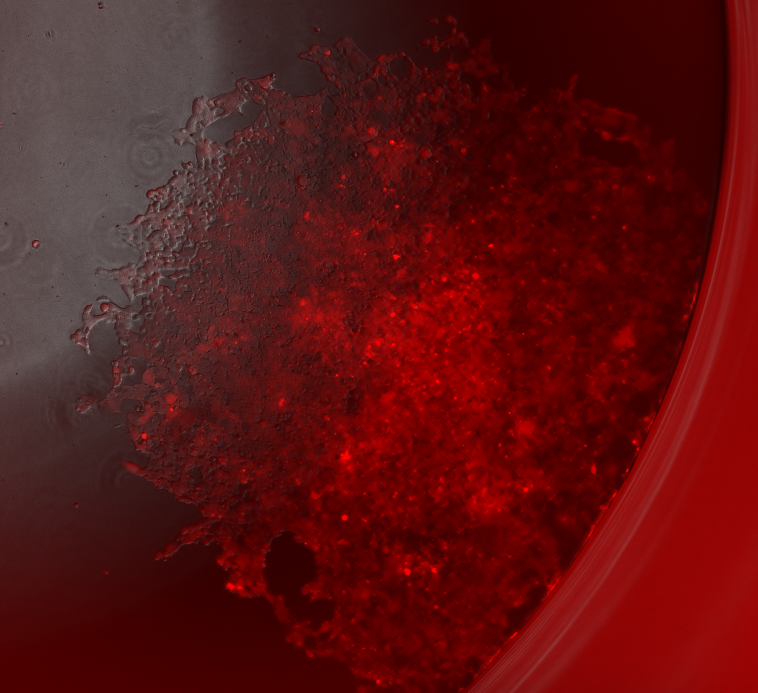
Example of what outgrowth looks like when grown out from a single-cell dilution. This is one well in a 96-well dilution plate.
If the overall integration percentage is high enough, you can do FACS or the BioMicroCenter single-cell sorting to isolate clonal lines. If not, you can use the microscope to re-pick.
Clonal selection or enrichment via flow sorting
Estimated time
2 hours pre-flow-sort, 20 minutes per sample for flow sorting (min 90 minutes of sort time).
Note
This assumes that you are sorting on the Sony in the flow core. You can review the Sony SOP
Two to three days before the sort, make sure you have enough cells going for conditioned media collection. A T75 flask of 293Ts or whatever cell type you are using are a good source for this.
The day before the sort, make sure you have enough cells to sort. You should have more than a million cells, ideally several million.
Prepare your destination tubes and plates. For tubes, if your media does not contain FBS, it is recommended to coat the inside of the tubes with 7.5% BSA solution (put ~1mL in, swirl it around, aspirate). For plates, remember to gelatin coat.
Prepare conditioned media. Collect 1-2 day old media from cells, and filter through a 0.22 micron filter. Combine this 1:1 with fresh media.
Spin down cells, as if you were passaging. Resuspend the cells and count them.
Resuspend cells to a final volume of 2-5 million cells per mL.
Add the prepared conditioned media to your tubes and plates to be sorting into.
Prep a box to bring with you to flow sorting. You should bring:
A P1000 and tips.
Gloves
Prepared tubes and plates to sort onto.
An extra plate for aligning, if sorting onto plates.
Falcon tubes with cell strainer caps.
Enough ice for how many plates you are sorting onto. Ideally, cells stay directly touching the ice once they are sorted.
Bring your stuff to the flow core and sort!
Note
If sorting onto plates, you should update the settings to place 100 cells in well A1, with 1 cell in other wells. This ensures that you will be able to locate the cells during outgrowth.
Return your cells to the quarantine incubator as quickly as possible.
At the end of the week, you likely will need to “top off” media to address evaporation.
One week later, you should be able to locate colonies under the microscope.
One week after that, passage cells onto 6-well plates.
Repicking
Repicking requires some trial and error using a pipette tip, but can get good enrichment of a target colony relatively quickly.
View the well of interest under the Keyence. Mark where the colony is on the top of the plate.
Prepare gelatin-coated destination plates. These should typically be 96 well plates. Fill the plates with media.
In the BSC, take a P200 tip, set to 50uL and depress the plunger. Scrape the pipette tip in small circles in the target area of the source plate, while slowly withdrawing media to suck up the cells as you scrape them off the bottom.
Deposit the 50 uL of cells into the destination plate.
Check the scraped regions under the Keyence, repeating if you missed the desired colony. If the media level in the source plate gets too low, just add more media to that well.
Genotyping your line
Diagnostic PCR can be performed to validate the presence of your transgene (random integration, site-specific) and whether it integrated to the desired locus (CRISPR, Landing Pad).
design primers specific for your cassette using Primer-BLAST. This tool helps pick primers that anneal only to your target and not other genomic regions.
Note
This is a predictive tool, therefore multiple primer pairs may need to be designed and tested.
For site-specific integration, design primers to perform “In-Out” PCR, as described here in Figure 3a.
Isolate genomic DNA from your cell line. When performing routine passaging, spin down an aliquot of cells (50,000-500,000 cells, depending on culturing scale) in a microcentrifuge tube and spin down at 3000 rcf for 5 min.
Aspirate media, and re-suspend pellet in 50 µL of Cell Lysis buffer supplemented with 0.5 µL of Proteinase K.
Note
If you’re processing multiple samples, you can make a Cell Lysis buffer/Proteinase K mastermix.
Transfer the solution to a PCR tube and incubate at 85 C for 45 min.
Microfuge the PCR tubes to pellet cell debris and use 1 µL of supernatant as template for 20 µL PCR reaction.
Important
If performing for the first time or you’re not planning to sequence verify the amplicons, using Taq colony PCR reagent is sufficient. To validate the sequence junctions for HDR/seamless integration into a LP, use a high-fidelity polymerase (ie., Q5).
For transgene-specific primer pairs, include your original vector as a positive control and genomic DNA from untransfected/untransduced cells as a negative control. For site-specific primer pairs, you can only run the negative control (super annoying, I know).
Note
Genotyping can be challenging. Touchdown PCR and nested PCR has helped DSP amplify some tricky genomic DNA segments.
Rogi1 and Rogi2 LPs
We currently have monoclones for v2 and v3. The table below highlights the key attributes of each LP architecture:
V2 Rogi1/Rogi2 dual LP RMCE line:
locus |
pHA for cargo |
recombinase |
positive selection (gene, drug) |
counterselection (gene, drug) |
|---|---|---|---|---|
Rogi1 LP |
pKG01862 |
Cre |
N/A |
iCasp9, AP1903 |
Rogi2 LP |
pKG02278 |
Bxb1 |
N/A |
HSV-TK SR39h, GCV or PCV |
V3 Rogi1/Rogi2 dual LP single site integrase line:
locus |
pHA for cargo |
recombinase |
positive selection (gene, drug) |
counterselection (gene, drug) |
|---|---|---|---|---|
Rogi1 LP |
pKG02180 |
Bxb1 |
BsdR, Blasticidin |
HSV-TK SR39h, GCV or PCV |
Rogi2 LP |
pKG02181 |
PhiC31 |
BleoR, Zeocin |
iCasp9, AP1903 |
RMCE integration of payloads into V2 line
Note
These protocols are still in development! Important variables that need optimization include: 1) the ratio of recombinase to donor plasmid 2) dosing schedule of drug selection/counterselection 3) scale needed to obtain a sufficient number of recombined cells