Startup checklist when working with repositories
When both creating a new repository or cloning (creating a local copy) of an existing repository, certain “startup tasks” need to be completed. These typically only have to be performed once, when you create the local copy, not every time you work with the repository.
New repository (Python)
Create a new repository on Github, likely inside the GallowayLabMIT organization, by going to: https://github.com/organizations/GallowayLabMIT/repositories/new
When creating the repository, you likely want to check Add a README file and you should select Python as the
.gitignoretemplate. Setting the.gitignoremeans that Git will start off by ignoring all Python-related temporary files. You can update and modify the ignore list later.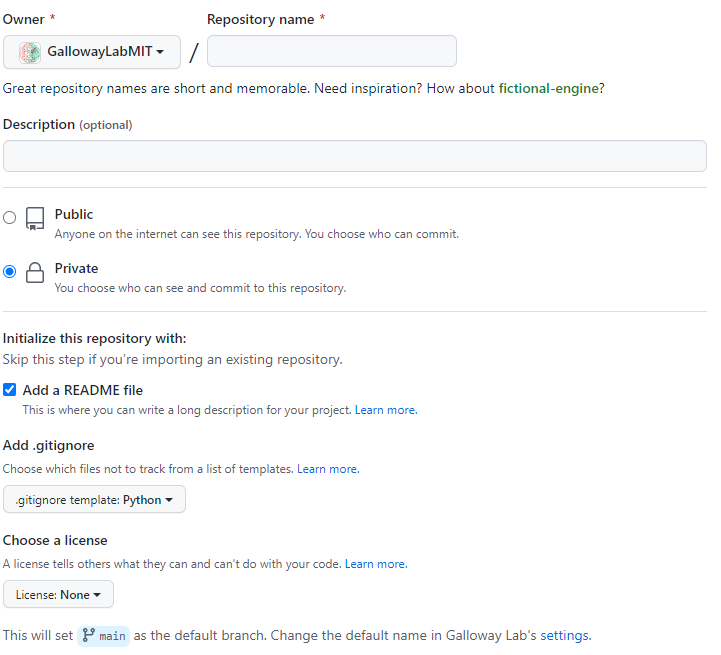
Unless you know what you are doing, you can leave the License field set to None initially.
Clone the repository to some local folder, and open a terminal (or VS Code instance) into the repository folder.
Create a virtual environment (
python -m venv env) for this project.If in a terminal, activate the virtual environment (see Python/Sphinx setup for help activating)
Note
If you are working inside VSCode, right after you create the virtual environment, you may get a popup that says something akin to “New virtual environment detected. Do you want to set this environment as your project environment?” Answering yes means that all launched Python instances should use that environment by default.
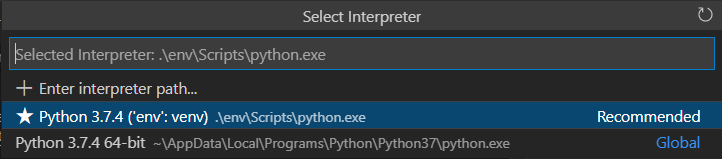
If you don’t see the popup, you can also set the Python environment through
the Command Palette. Press ctrl-shift-p or command-shift-p, type in select interpreter,
select Python: Select Interpreter and click the Python installation in your
newly created virtual environment.
Install packages you need. For data-analysis projects, this is likely
pip install numpy scipy matplotlib seaborn rushdIf you are planning on using Jupyter notebooks, it is a best-practice to additionally install
nb-cleanviapip install nb-clean. Then, runnb-clean add-filter. From then on,nb-cleanwill automatically run alongside Git as a filter, making sure that extraneous notebook metadata does not get committed to version control.
Save your environment into a
requirements.txtfile usingpip freeze > requirements.txt. This means other people can reproduce exactly the set of packages you just installed. If you install or update packages later, remember to update the requirements file by repeatingpip freeze > requirements.txt.If using data in the OneDrive/Sharepoint, create a
datadir.txtfile in the top-level folder of the repository that contains one line with the full, absolute path.Add
datadir.txtto your.gitignorefile. This means editing the.gitignoreand adding a line anywhere, typically at the top, that contains justdatadir.txt.
New repository (Julia)
Create a new repository on Github, likely inside the GallowayLabMIT organization, by going to: https://github.com/organizations/GallowayLabMIT/repositories/new
When creating the repository, you likely want to check Add a README file and you should select Julia as the
.gitignoretemplate. Setting the.gitignoremeans that Git will start off by ignoring all Julia-related temporary files. You can update and modify the ignore list later.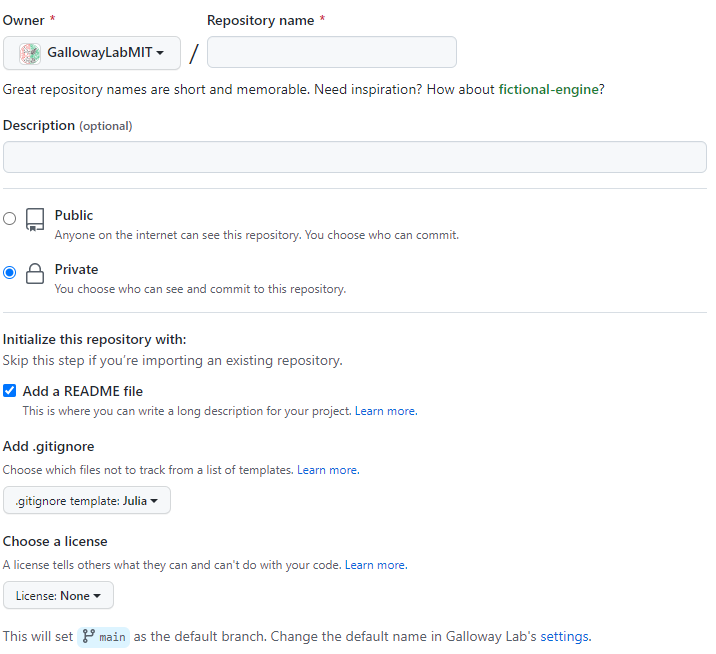
Unless you know what you are doing, you can leave the License field set to None initially.
Clone the repository to some local folder, and open a terminal (or VS Code instance) into the repository folder.
Start a Julia instance inside a local virtual environment by typing
julia --project=.into a terminal. Unlike Python, you do not have to pre-create a virtual environment, and you specify a virtual environment at launch using the--projectsyntax.Inside the Julia prompt, press
]; the prompt should change to(folder_name) pkg>. Typeadd pkg1 pkg2to install packages into the virtual environment.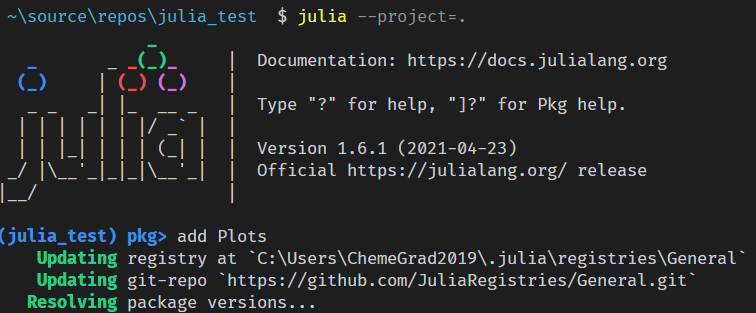
When you add or update packages later, be sure to commit the
Manifest.tomlandProject.tomlfiles! These encode how others can reproduce your set of packages.
Once you have
.jlfiles, VSCode should auto-select your local virtual environment. If it doesn’t, you can open the command palette (ctrl-shift-porcommand-shift-p) and search for “Julia: Change Current Environment” and select your newly created virtual environment.
New repository (R)
Warning
TBD. R’s virtual environment system is non-built-in and is also bad compared to other systems. It is really hard to decouple system state in a reproducible way in R compared to Julia and Python.
A possible best practice environment (Dockerized containers) currently under beta testing.
Existing, non-data-driven repository (e.g. protocols)
Clone the repository to some local folder.
Start a terminal/VSCode isntance in the folder.
If using Python:
Create a virtual environment using
python -m venv env.Activate the environment (see New repository (Python) for details on activating in VSCode/terminal).
Install the current package versions for this project using
pip install -r requirements.txt.
If using Julia:
Start Julia within a local virtual environment with
julia --project=..Enter package mode by pressing
].Run
instantiateto automatically install the reproducible list of packages in the Manifest and Project files.
Any additional setup should be described in the
README.mdfile of the repository.
Existing, data-driven repository (e.g. tangles_model)
Perform the steps in the above section, Existing, non-data-driven repository (e.g. protocols).
If using Jupyter notebooks, run
nb-clean add-filterto register the Jupyter notebook cleaning filter with Git.If using
rushd, add adatadir.txtfile to the root folder of the repository, containing the absolute path to the OneDrive/Sharepoint folder (e.g. the folder that directly contains the folders such asprojects,manuscripts, etc).