Stale warning
This protocol has not been updated this year! Last update was on April 01, 2025.
Incubator decontamination
Please refer to the manuals for detailed decontamination instructions. Below are additional tips and instructions not stated in the manuals. Decontamination should be performed at least twice per year, or after significant contamination occurs.
Note
Because the incubators heat up significantly during decontamination, an entire stack (top and bottom) should be decontaminated simultaneously.
Moana and Maui (Main TC)
Follow instructions on the incubator display.
Hei Hei and Pua (Main TC)
Estimated time
Decontamination takes approximately two days, with about 30 minutes of hands-on time.
The Hei Hei/Pua incubator manual is located in the drawer to the left of the sink in the main TC room. Refer to Chapter 9 (page 53) for detailed instructions.
Day 1
Turn off the incubator (switch located below the door on the left) and turn off CO2 flow (silver levers on the wall).
Remove and empty the metal water tray. This tray may be autoclaved.
If any water remains in the bottom of the incubator, use the water pump hanging on the side of the incubator to empty.
To operate the water pump:
Place the water pump on the lowest shelf of the incubator and feed the inlet hose through a hole in the shelf to the water (see diagram below).
Place the outlet tube into a bucket located below the lowest shelf.
Pump about four times to start the flow of water.
Let the water run into the bucket via gravity.
Use a paper towel to wipe any remaining water from the floor of the incubator.
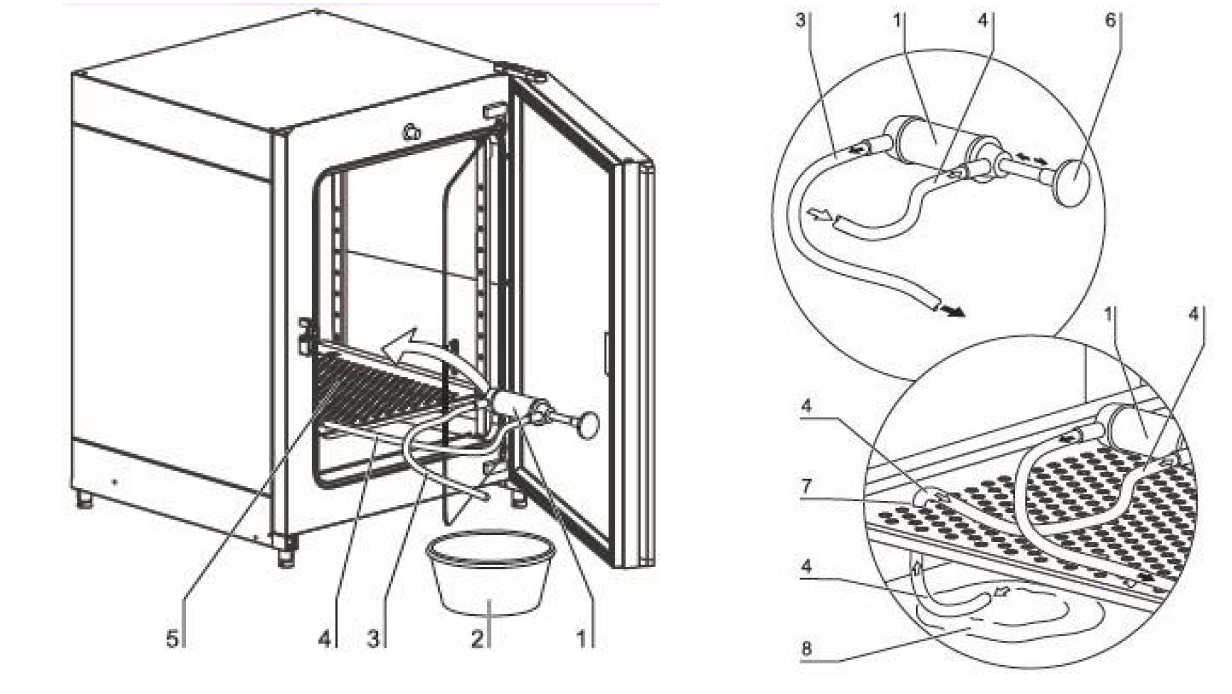
Diagram of the water pump setup and parts: (1) pump, (2) bucket, (3) outlet hose, (4) inlet hose, (5) lowest incubator shelf, (6) pump hand grip, (7) incubator shelf hole, (8) water on incubator floor.
Remove and disassemble incubator components (3 shelves, 1 water tray per incubator)
Disinfect the incubator components by wiping down with 10% bleach followed by ethanol. Also wipe down the interior of the incubator.
If necessary, the blower wheel can be removed to be more thoroughly cleaned. Refer to the manual (page 56) for instructions.
Replace the metal water tray and fill with autoclaved DI water.
Follow the manual instructions (page 58) for starting the 90ºC decontamination cycle. This will take approximately 25 hours to complete.
Heating: 2 hours
Decontamination: 9 hours
Cool down: 11 hours
Postheating: 3 hours
Day 2
Once the decontamination routine is complete, wipe up any water on the bottom of the incubator and make sure the water tray is still filled.
Reconnect CO2 flow.
Finish the decontamination cycle by holding down the 90ºC button for 5s (see manual instructions, page 59). The display should switch from 0h to the CO2 level.
Follow manual instructions (page 45) to begin the auto-start routine. This will take approximately 5 hours.
After the auto-start routine finishes, the incubators can be used.
Te Kā (Quarantine) and Te Fiti (66-219)
Estimated time
Decontamination takes approximately two and a half days, with about two hours of hands-on time.
Warning
Decontaminating these incubators requires the HEPA (1 per incubator) and inlet (2 per incubator) filters to be replaced. Ensure that you have replacements before beginning!
Materials
Filter information:
The incubator decontamination instructions are located in a plastic sleeve on the side of the incubators. See Te Kā/Te Fiti incubator manual for additional instructions.
Day 1
Turn off the incubators (power switch is located on the top left side of each).
Turn off carbon dioxide flow by screwing the knob counterclockwise until the pressure gauge reads zero. The carbon dioxide tanks are located on the wall to the left of the incubators.
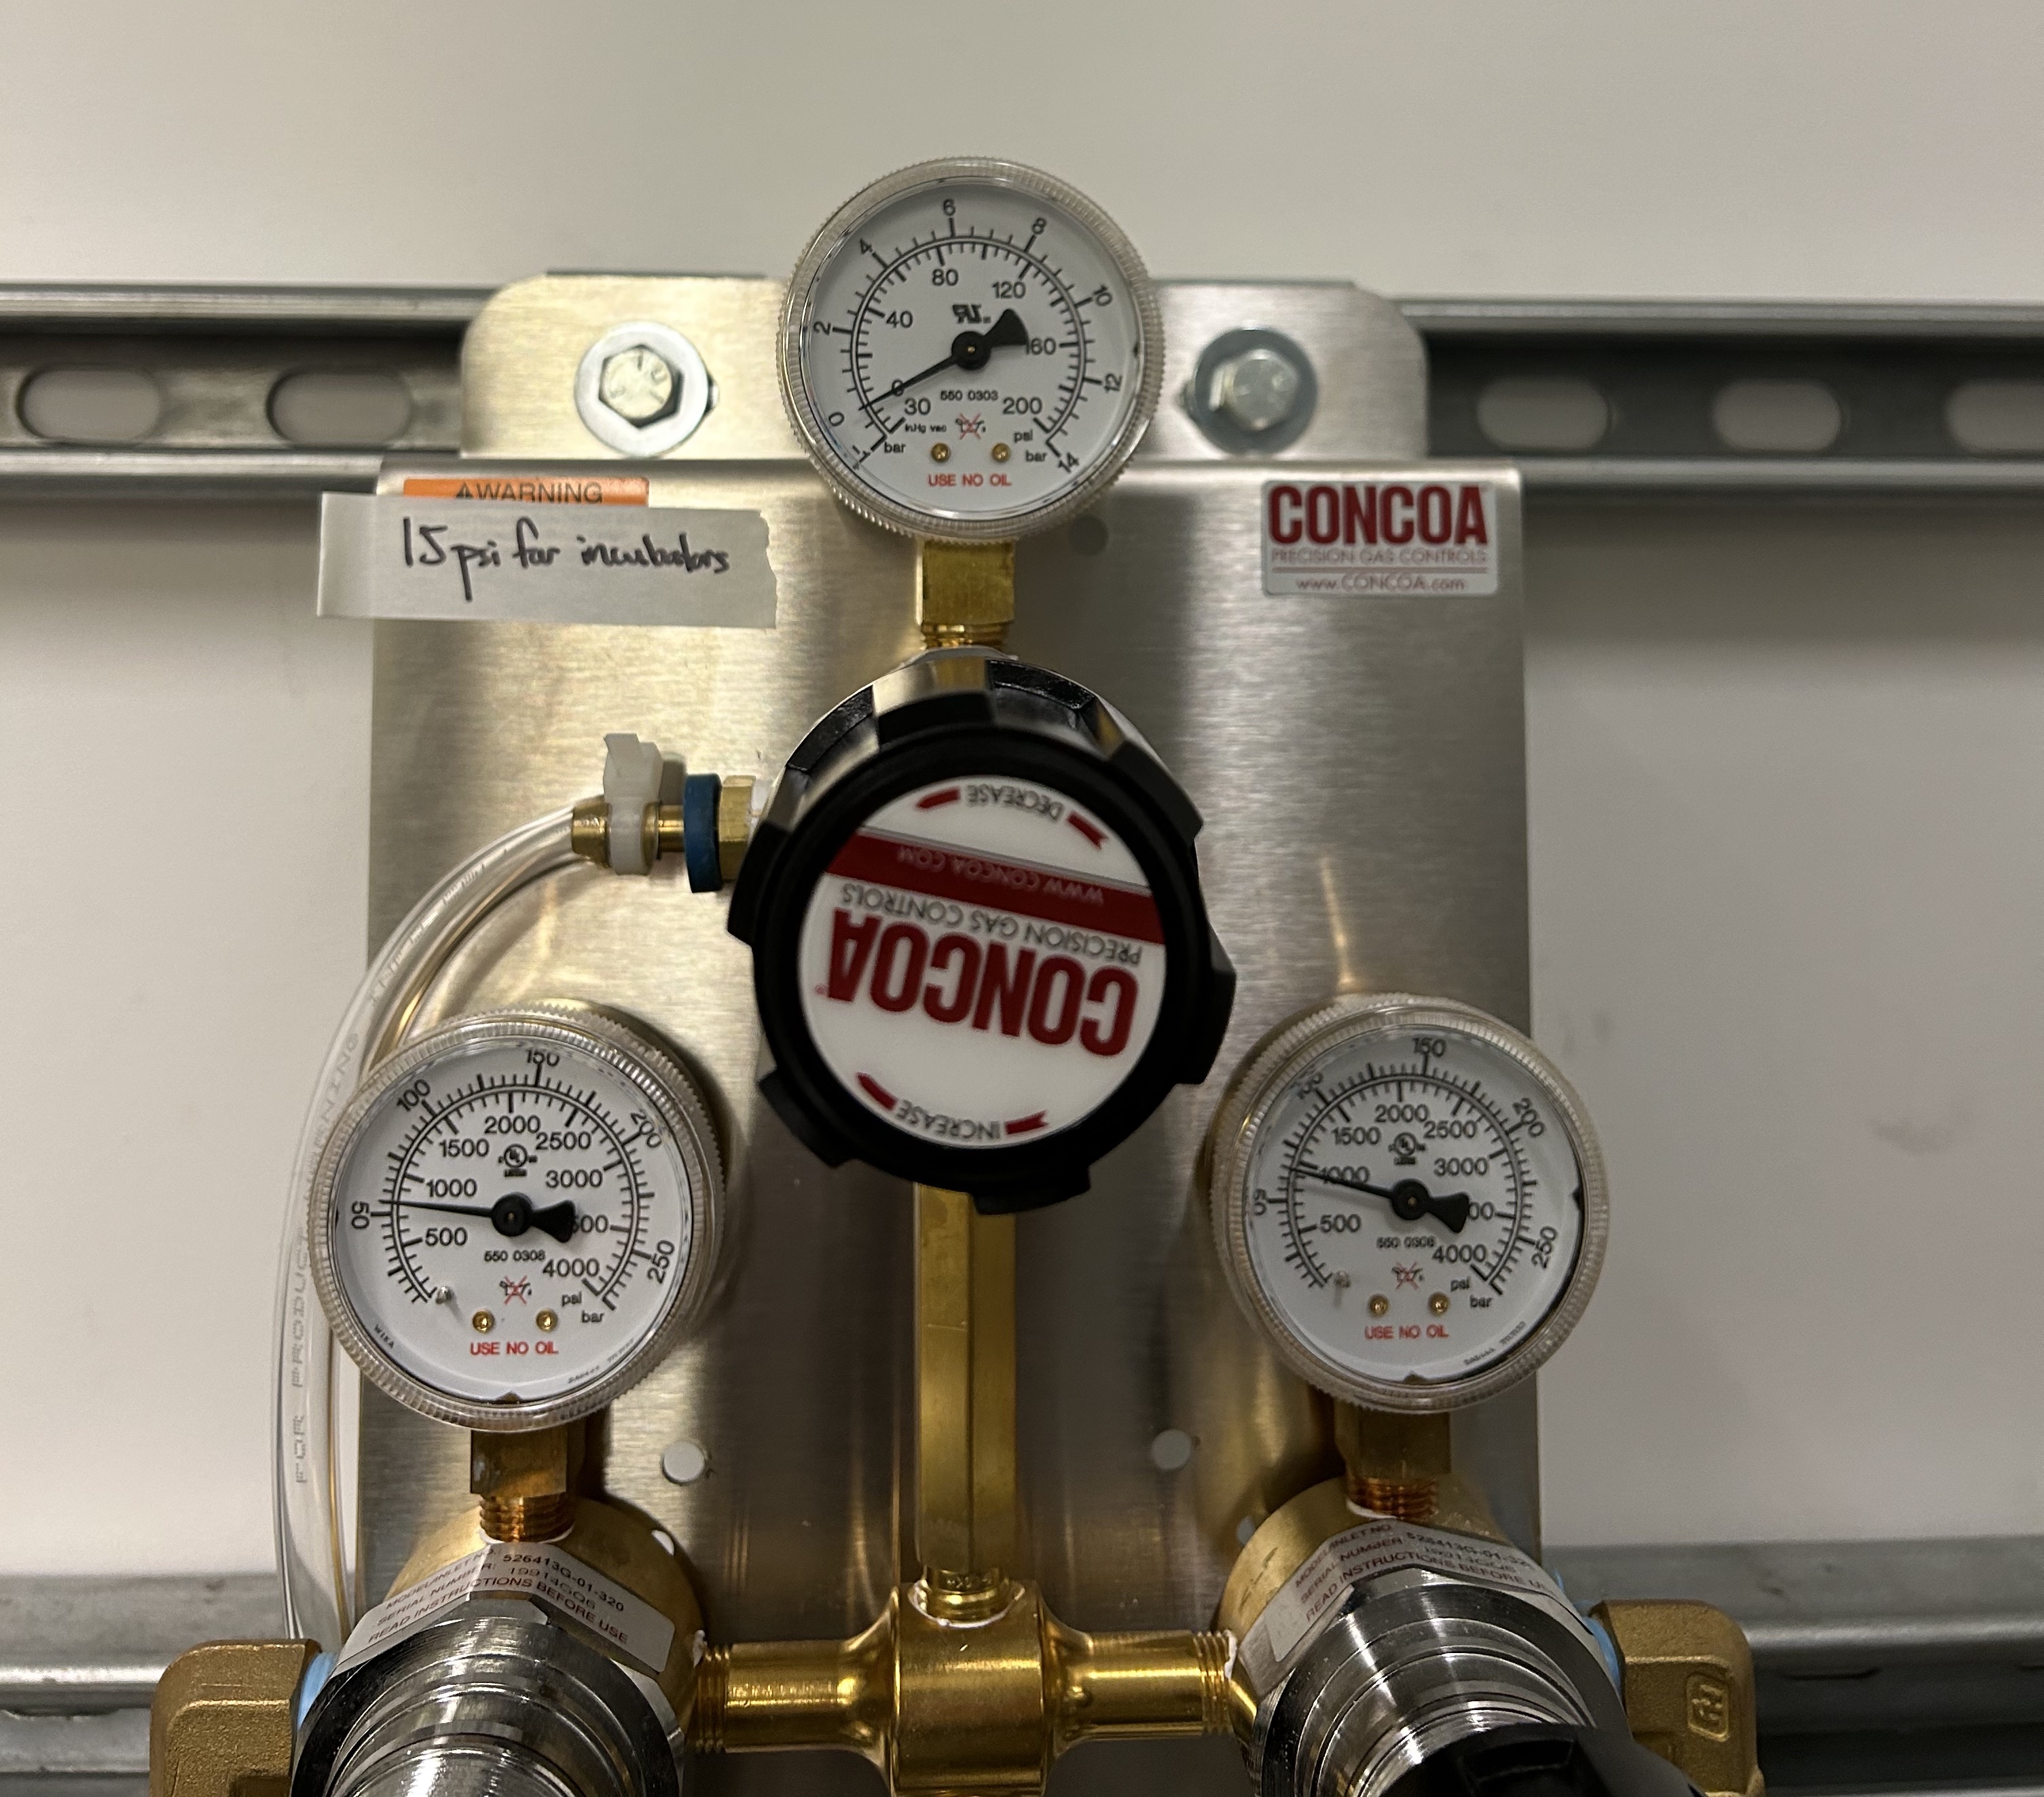
Carbon dioxide knob (black, center) and pressure gauge (top, currently at 0 psi).
Disconnect the carbon dioxide tubing from the back of the incubators. Be sure the tubing is not touching the incubator—the incubators get very hot during decon!
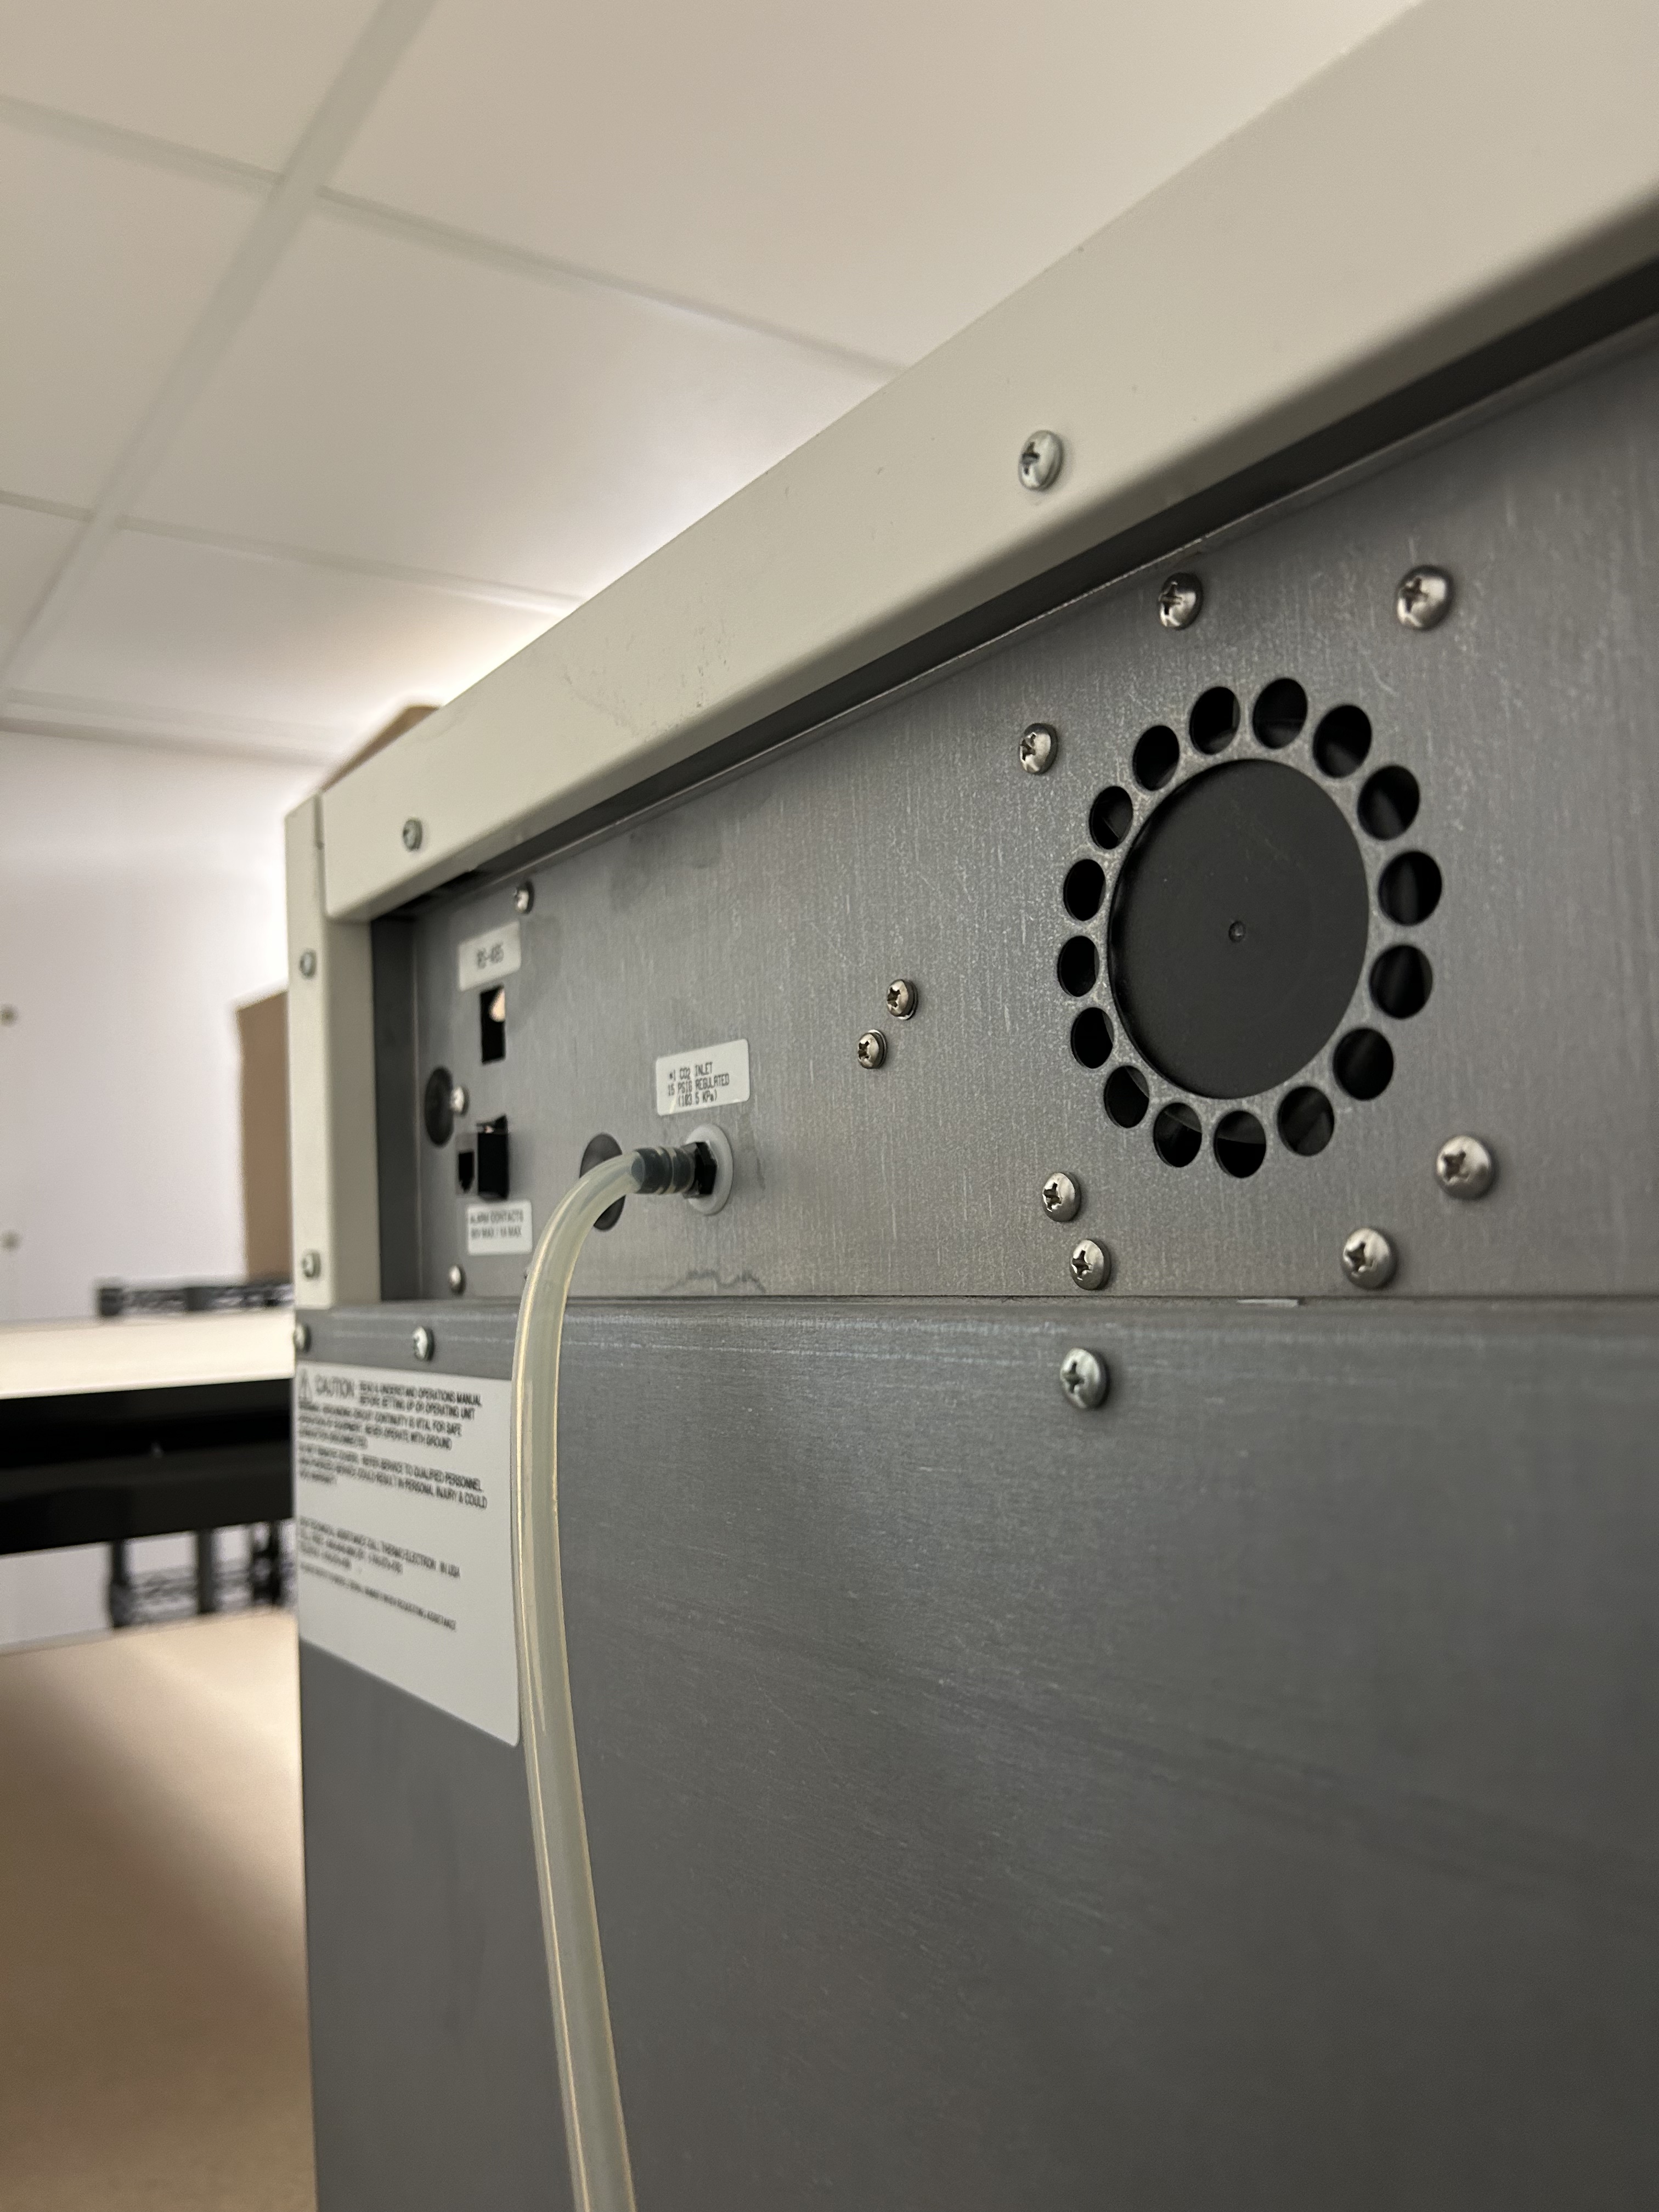
Carbon dioxide tubing connected to the back of Maui (top incubator).
Remove and discard used filters in biowaste: 1 HEPA and 2 inlet filters.
Remove and disassemble all internal components from each incubator. Items below are listed in the order to remove:
1 water tray
3 shelves
Side walls: 2 wall pieces, 6 shelf support bars
Outer ceiling component: 1 large metal piece with rubber hose, 2 large wing nuts
Inner ceiling component: 1 white plastic air circulator, 1 metal piece, 1 hex nut, 4 small wing nuts
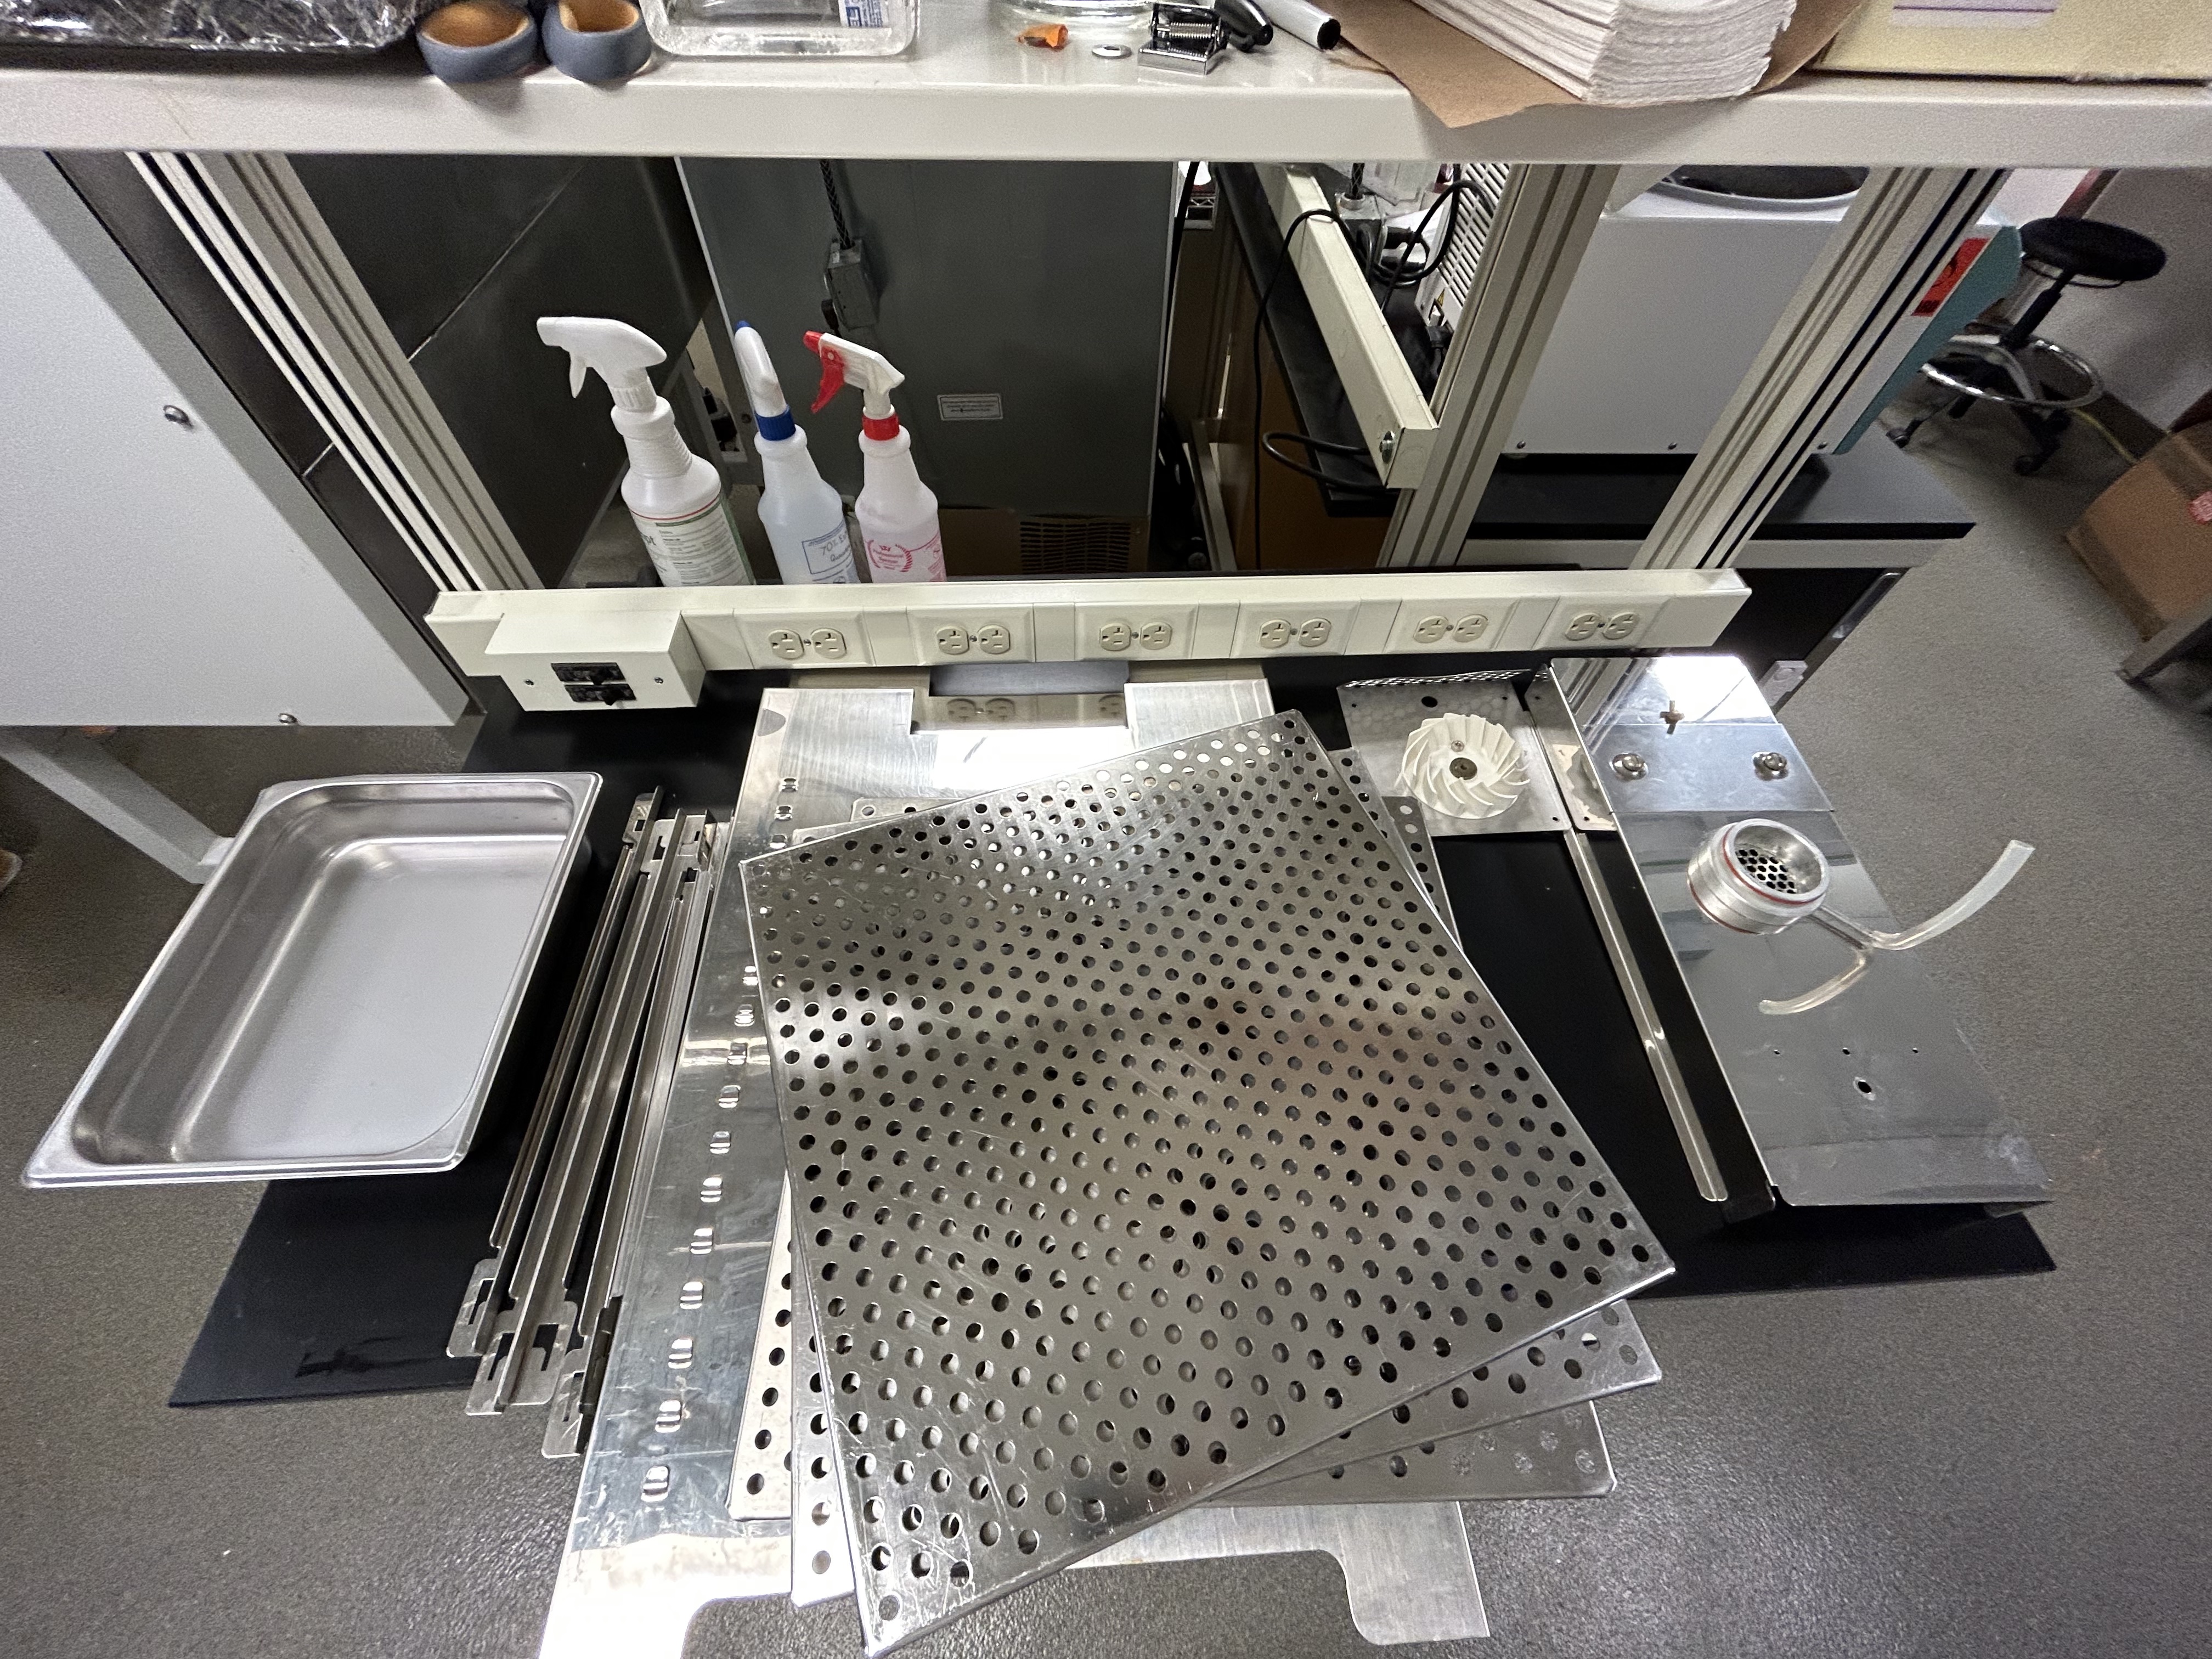
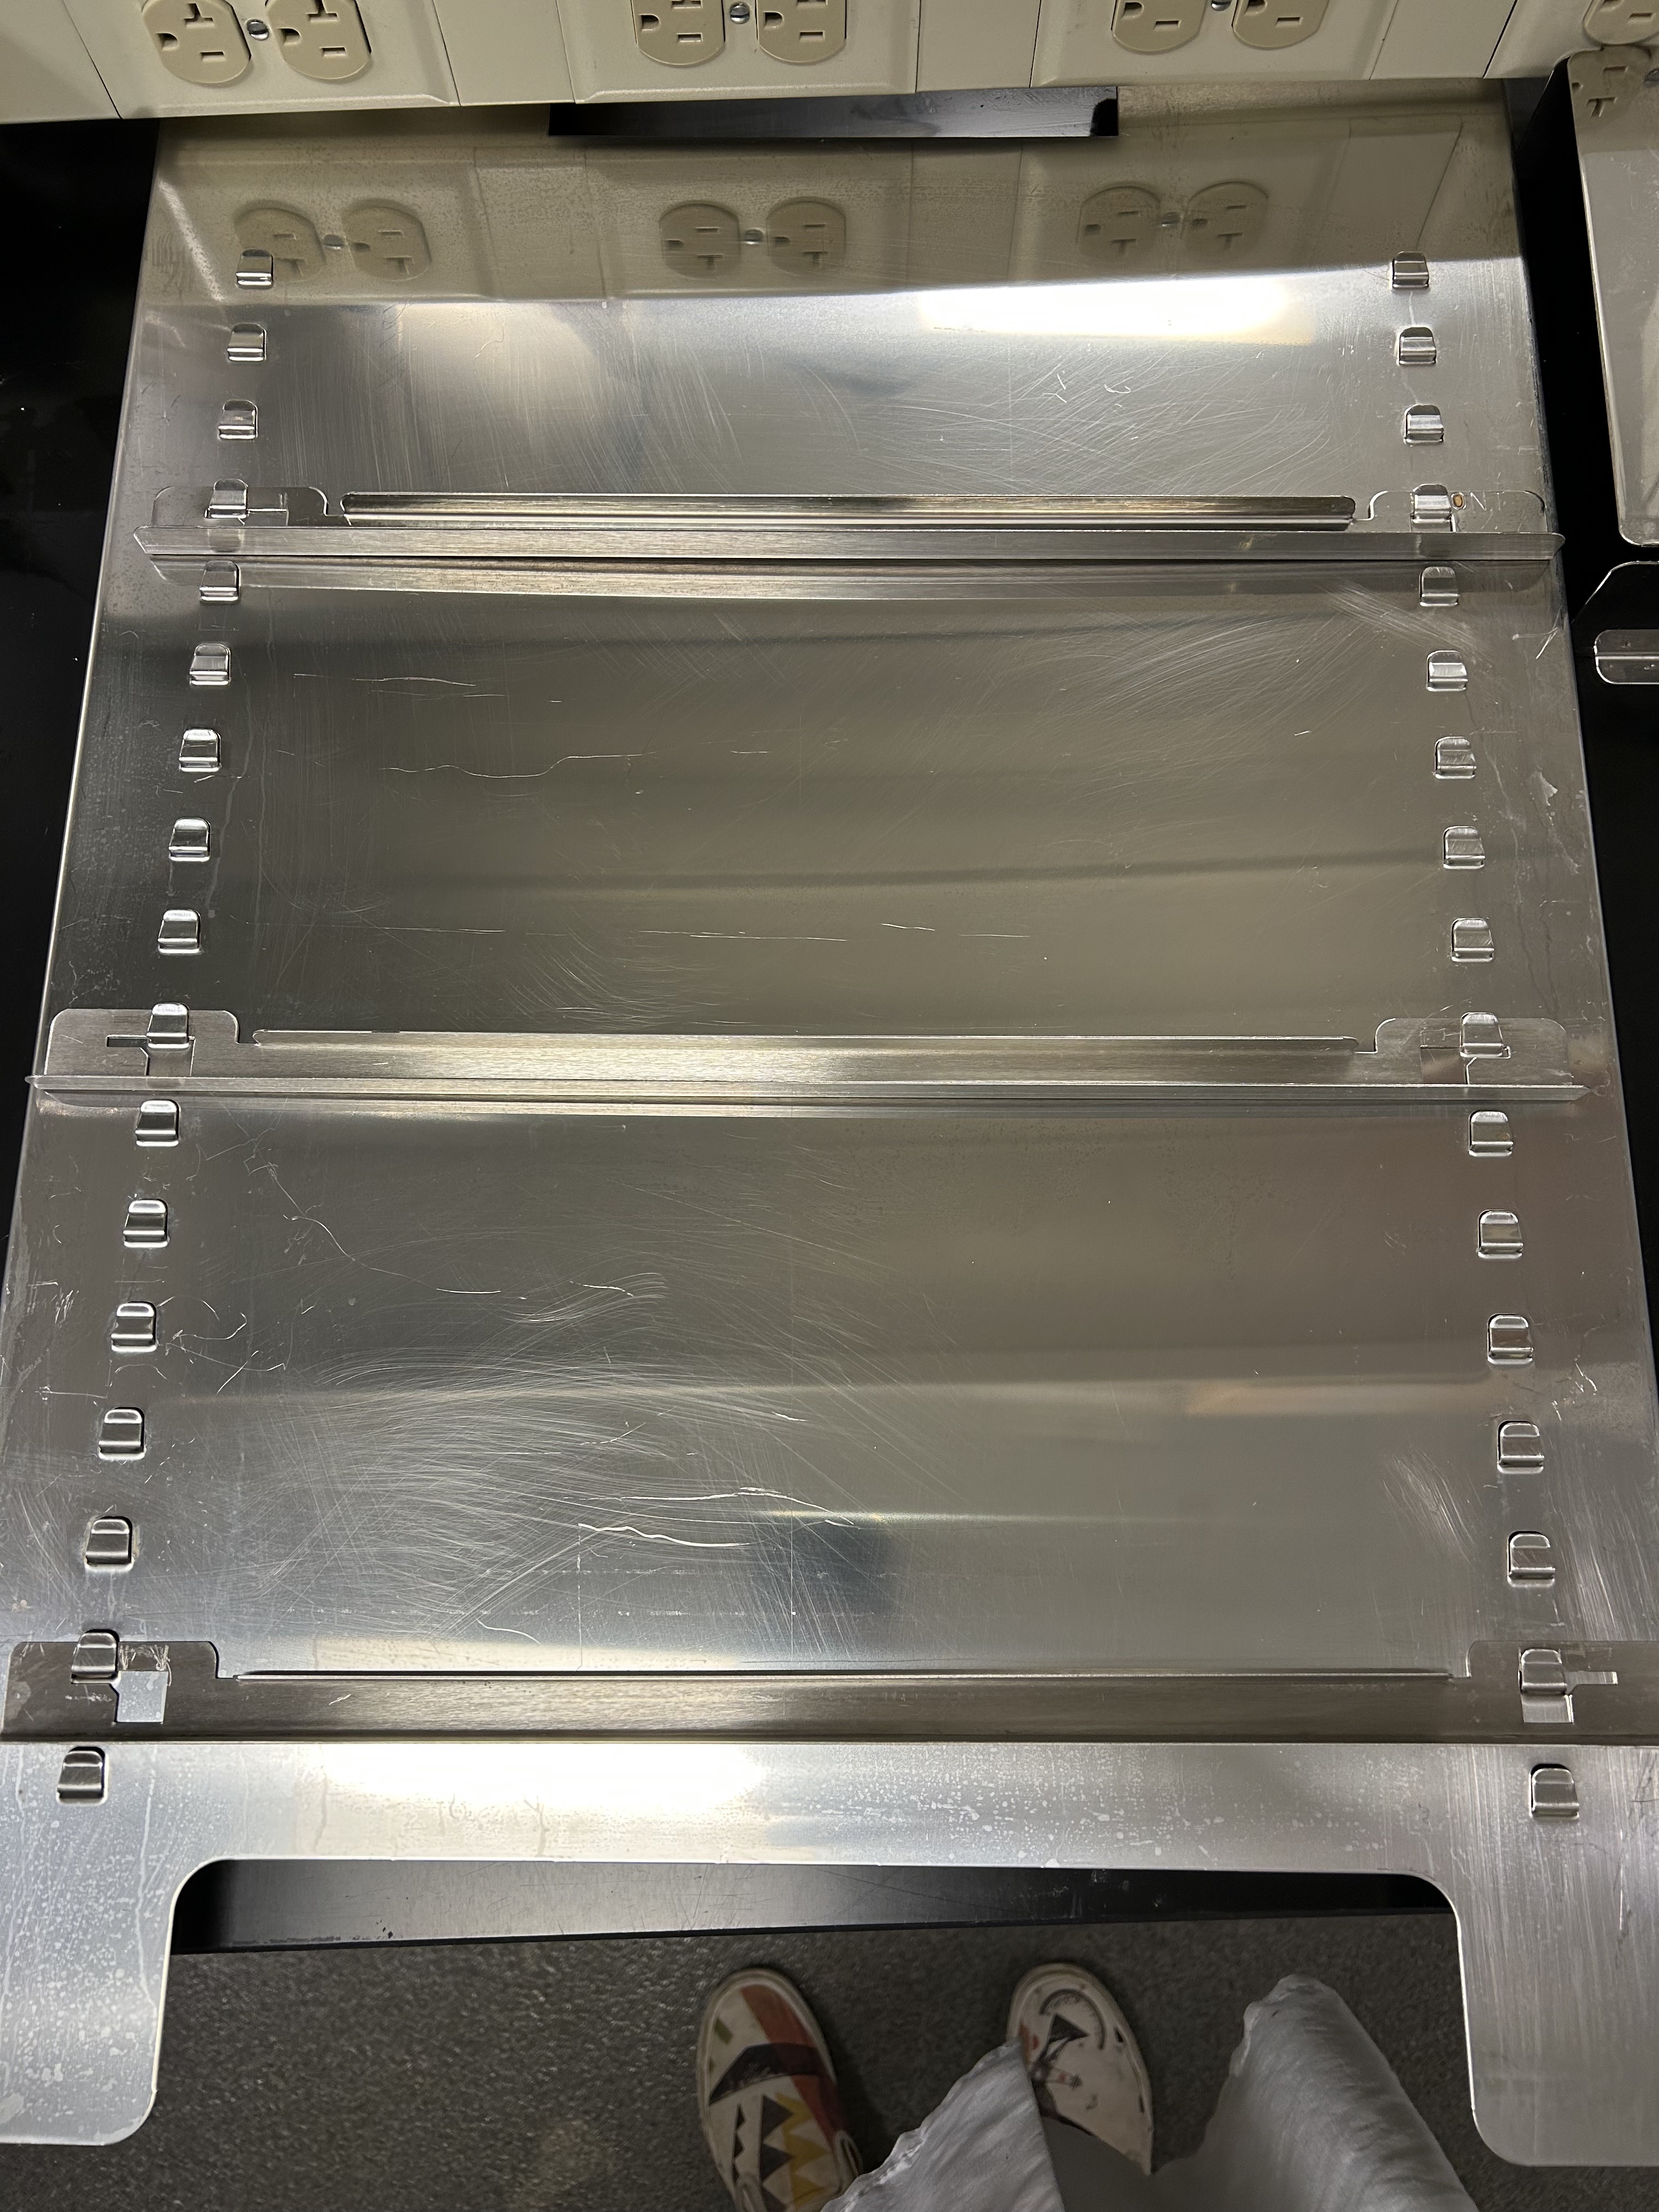
Disassembled parts from one incubator.
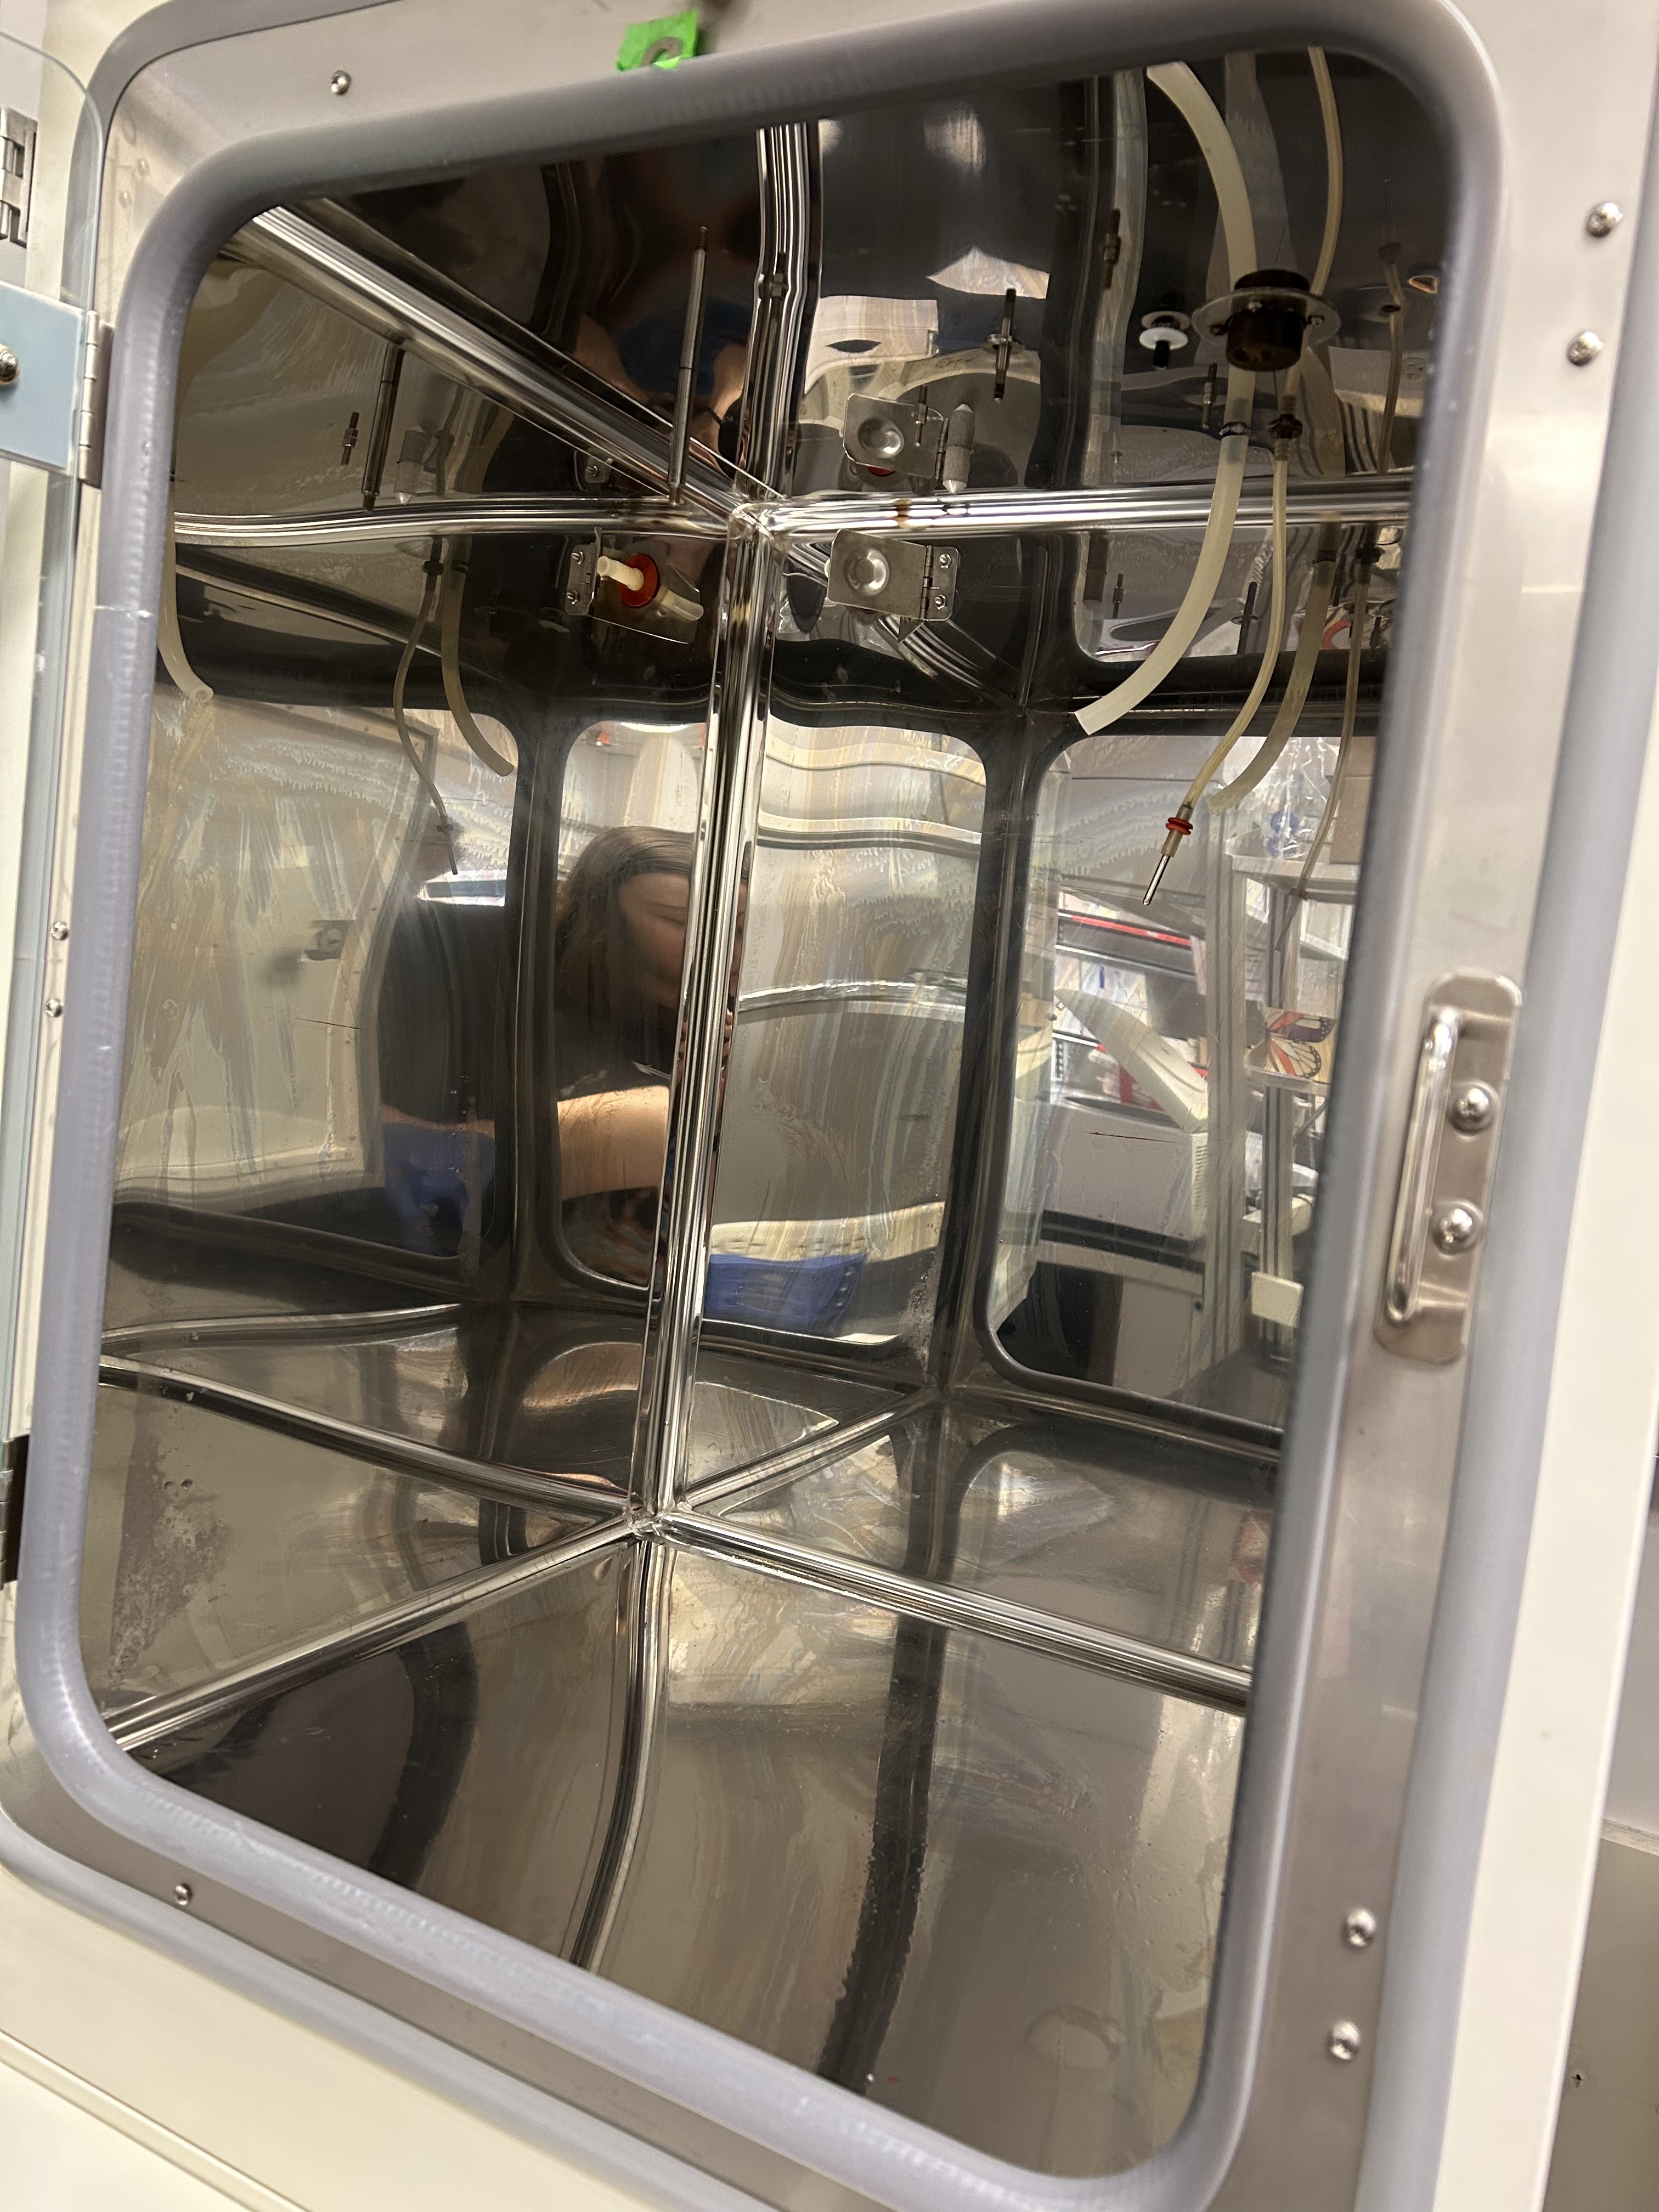
Interior of a disassembled incubator.
Disinfect the incubator components with a dilute bleach solution followed by ethanol. Also disinfect the inside of the incubator and glass door.
Tip: Fill one of the water trays with 10% bleach and dip paper towels into the solution to clean
Wear a lab coat for this cleaning step to prevent bleach from staining your clothes. Be sure to put the dirty lab coat in the laundry hamper once you finish!
It is recommended that 2 or more people help with this cleaning step (approximately 1 hour)
Replace all internal components (reverse order of the above list, this does NOT include filters).
Location of shelf holder bars.
Turn the incubators on and initiate the sterilization cycle by holding down the green button on the right for 3 seconds. The screen will flash “Remove HEPAs” and “Remove water”, press Enter to continue.

Diagram of the incubator display with the sterilization cycle button indicated.
Place the “Incubator decon in progress” sign on the incubators and allow the sterilization cycle to proceed. This will take approximately 12 hours.
Heat up: 2-4 hours
Sterilization: 2 hours
Cool down: 6-8 hours
Day 2
Once the cycle is complete, open the chamber and install new filters (1 HEPA, 2 inlet; see diagram below). Insert the temperature sensor into the metal HEPA collar behind the large metal ceiling piece.
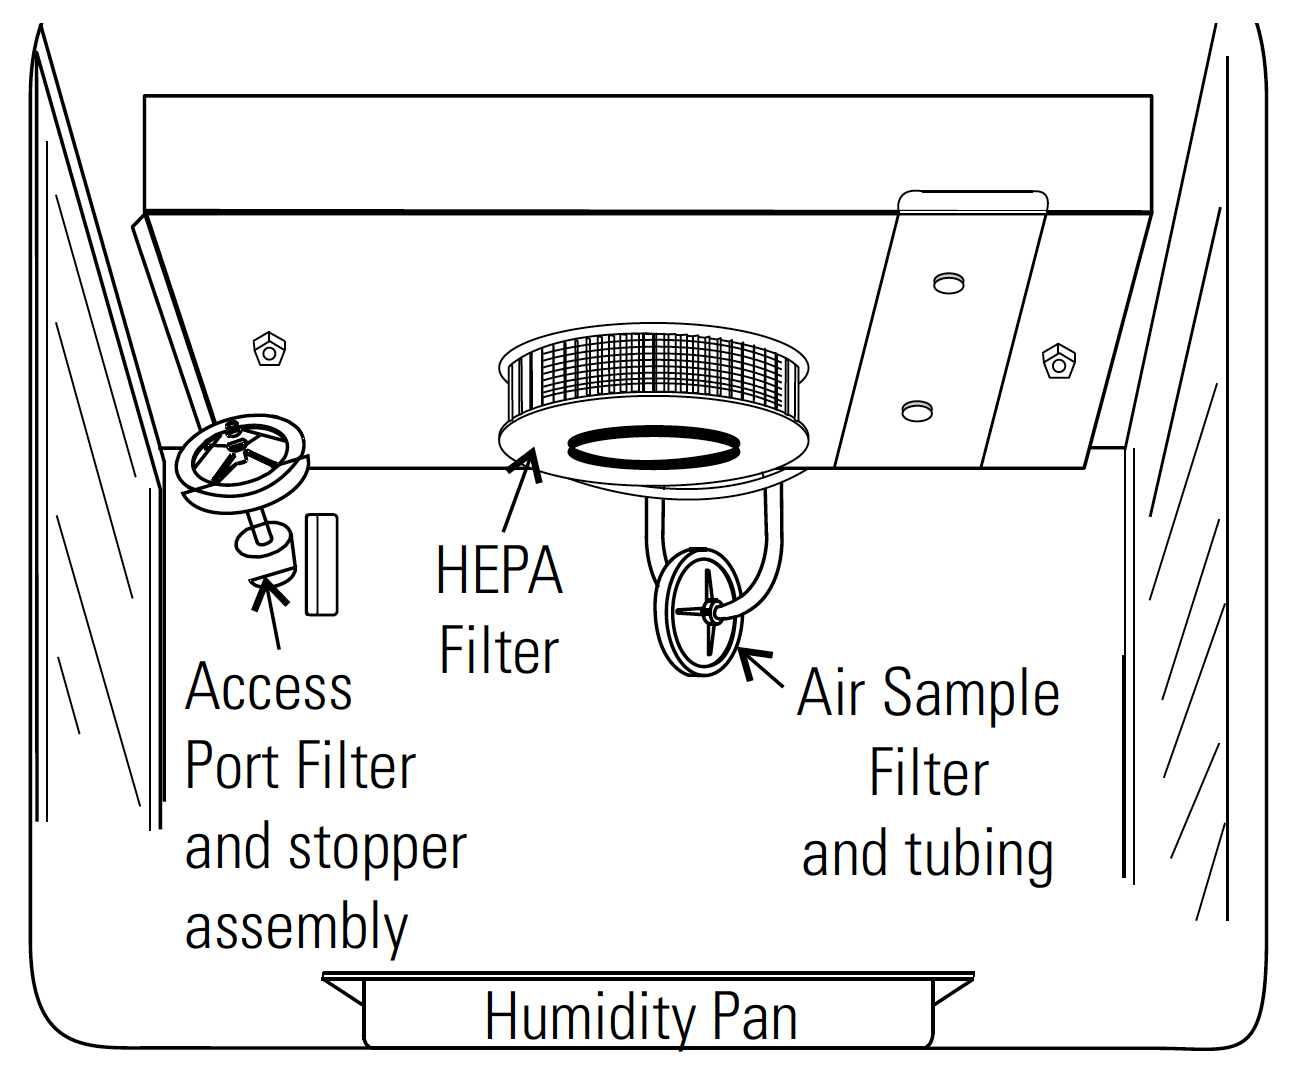
Diagram of the incubator filters. The inlet filters are labeled “Access port filter” and “Air sample filter”.
Fill the water tray with autoclaved DI water but DO NOT RECONNECT CARBON DIOXIDE. Allow the incubators to equilibriate for approximately 12 hours. If necessary, a shorter equilibriation period may suffice.
Day 2 or 3
Recalibrate carbon dioxide levels to zero on the incubator display.
Press “Mode” button
Toggle left/right arrow buttons until the display reads “CO2 CAL”
Press up/down arrow buttons to set the calibration value to 0.0
Press “Mode” button to finish
Reconnect the carbon dioxide tubes to both incubators (see image at step #3). Before turning on the carbon dioxide flow, it is recommended to turn off the incubators (power switch is located on upper left of each). This aids in finding any leaks/incomplete seals.
Turn on carbon dioxide flow by screwing the knob clockwise until the pressure gauge reads 15 psi (see image at step #2). If any audible leaks are detected, determine the source of the leak, turn off the carbon dioxide flow, resolve the issue, then turn the flow back on.
Turn the incubators back on. Once carbon dioxide levels reach 5%, the incubators may be used.