Stale warning
This protocol has not been updated this year! Last update was on September 15, 2023.
Replacing microcentrifuge motor mounts
The microcentrifuges have rubber motor mounts which can dry up and crack over time. This causes the rotors to be off-balance and very loud when the centrifuge is turned on. Replacing these rubber motor mounts cuts down on noise and extends the lifetime of the instrument.
Required materials
Part |
McMaster part number |
|---|---|
Rubber vibration mounts |
9376K21 |
Nuts |
95462A029 |
Washers |
90107A029 |
Lock washers |
95584A207 |
Procedure
Buy more McMaster parts if needed. We should have extras of most in the cabinet with the toolbox.
Remove the rotor from the body of the microcentrifuge by unscrewing the nut in the center of the rotor. We have a specific 10mm wrench for this step.
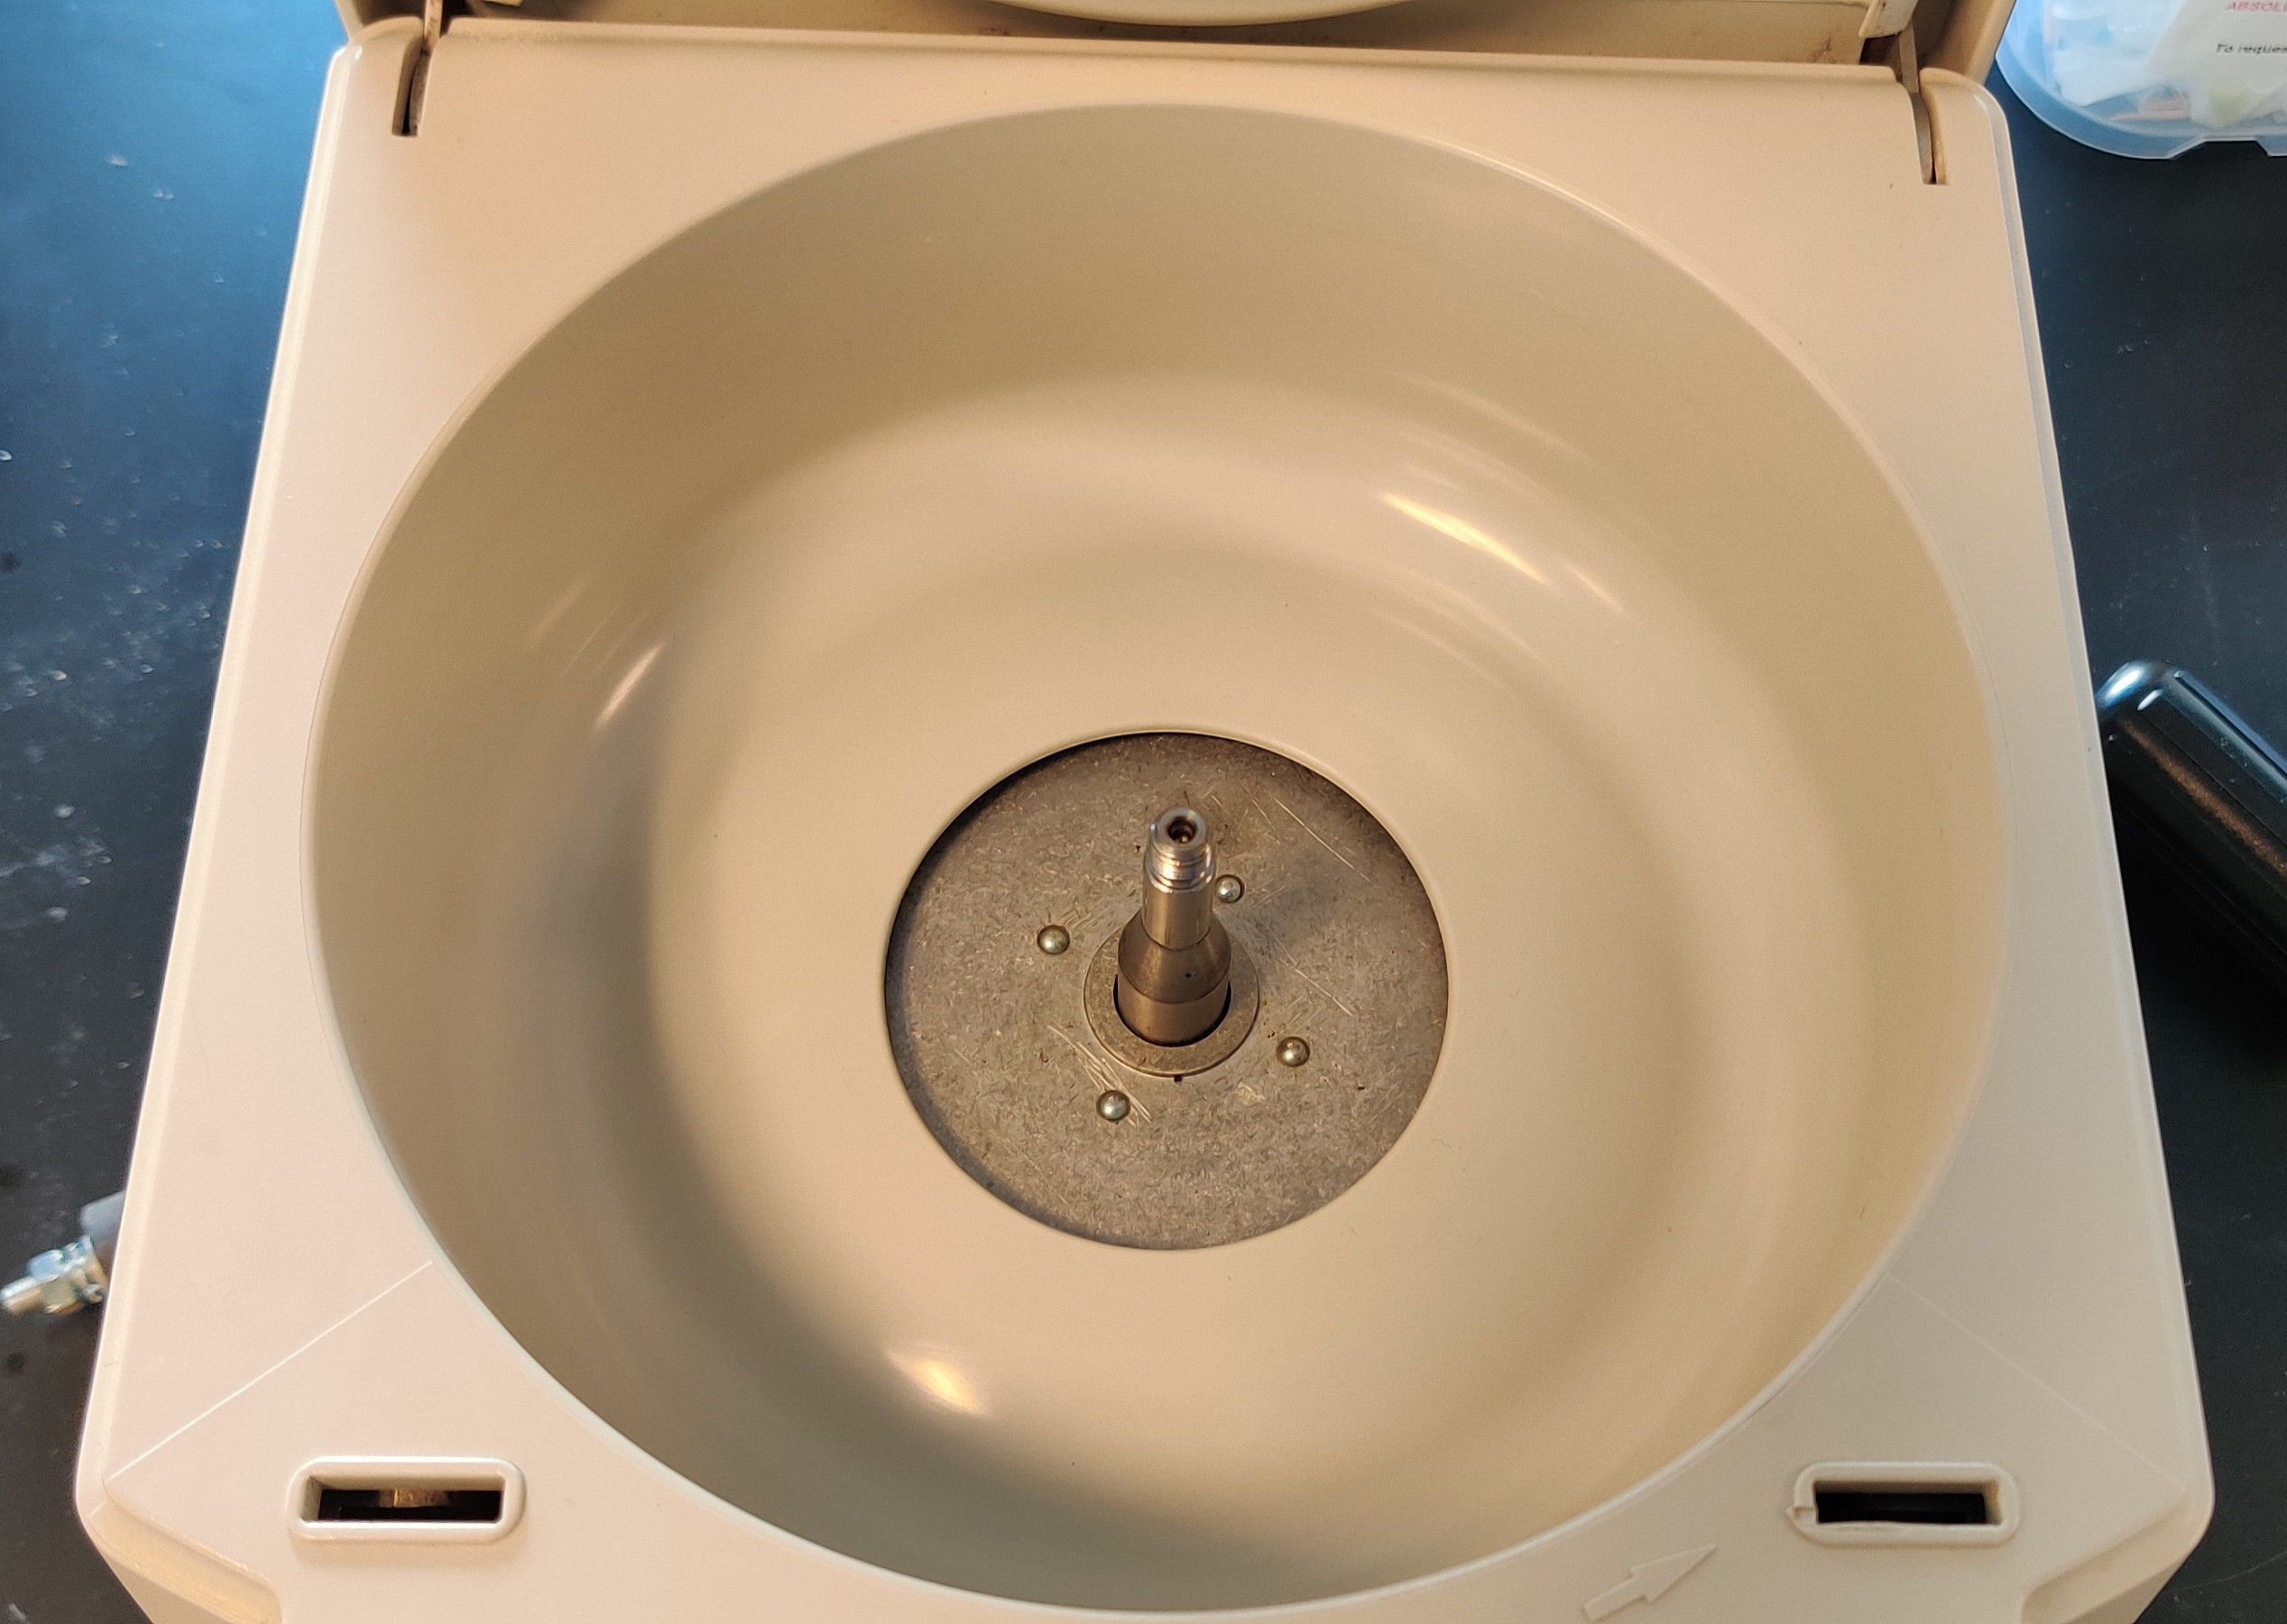
The top of the microcentrifuge with the rotor removed.
Unscrew the four side screws that attach the plastic shell and carefully lift it off, setting it to the right of the main body. Take special care not to disrupt the electronics.
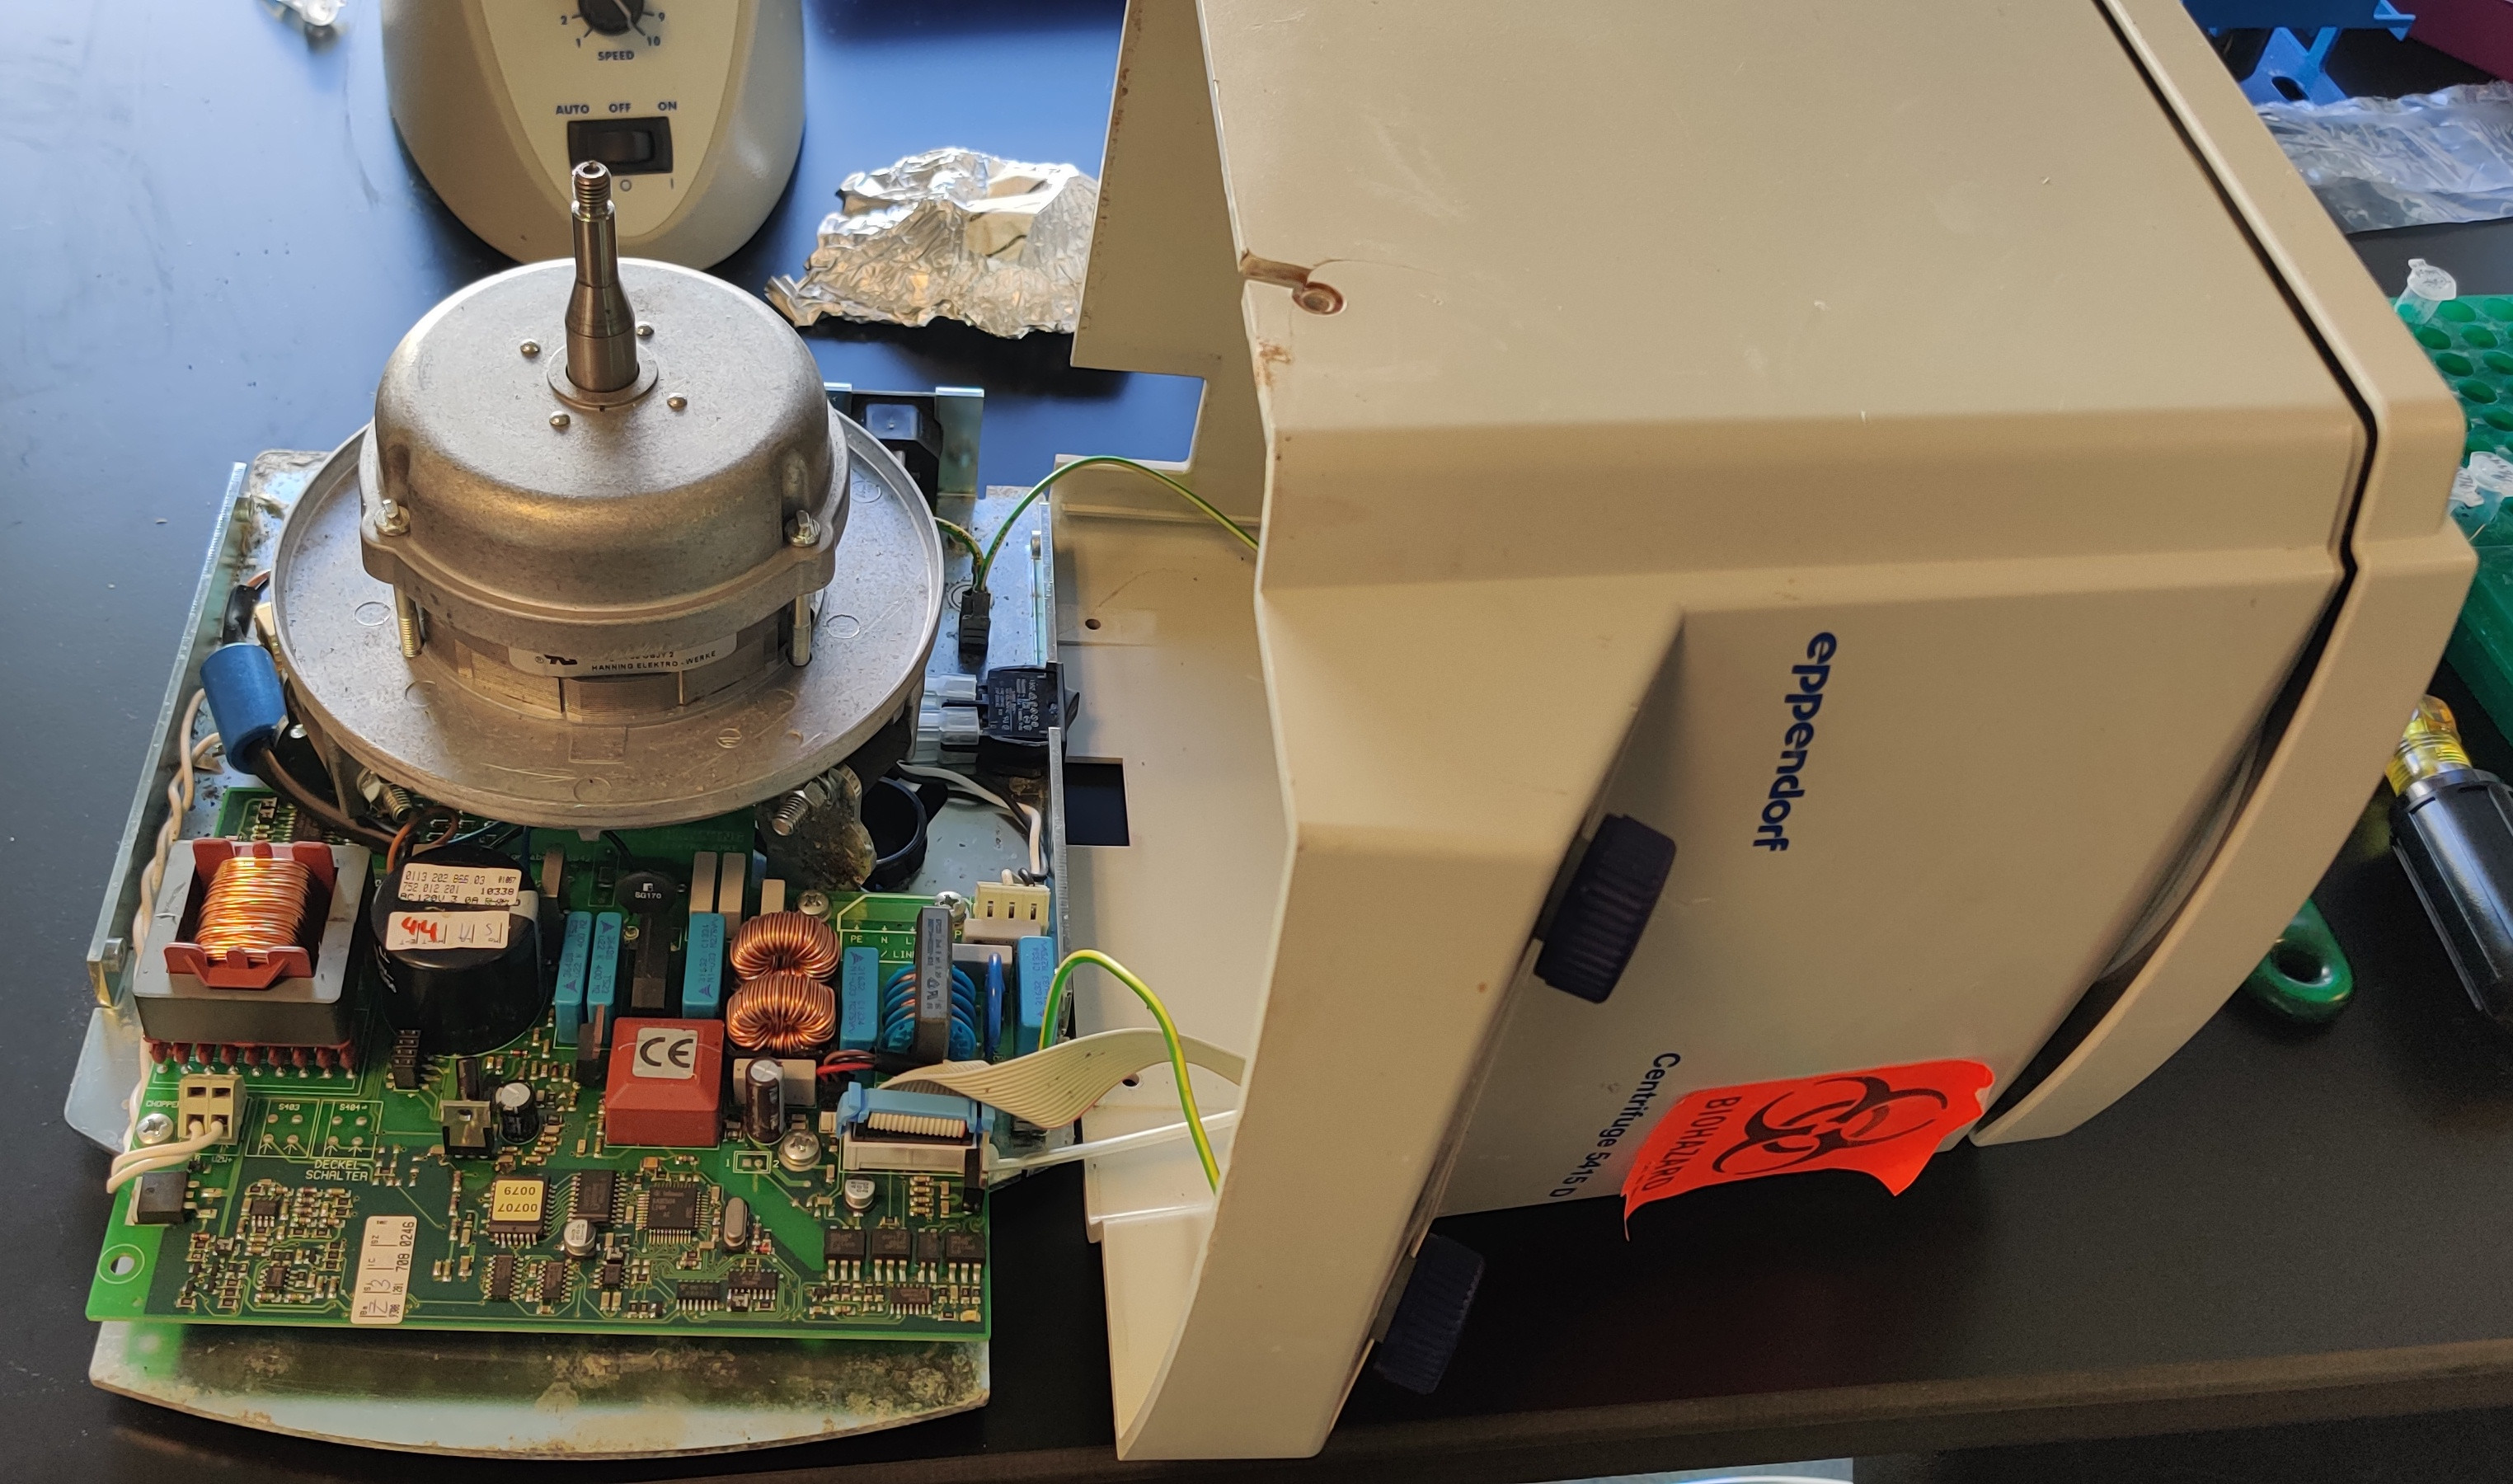
The centrifuge with the shell removed. You should not disconnect the wires; just leave the shell on the right.
Remove the old motor mount assemblies, replacing them with the new parts above. As seen in the picture, you should place washers on either side of the motor mount, and use a lock washer and a nut to secure it.
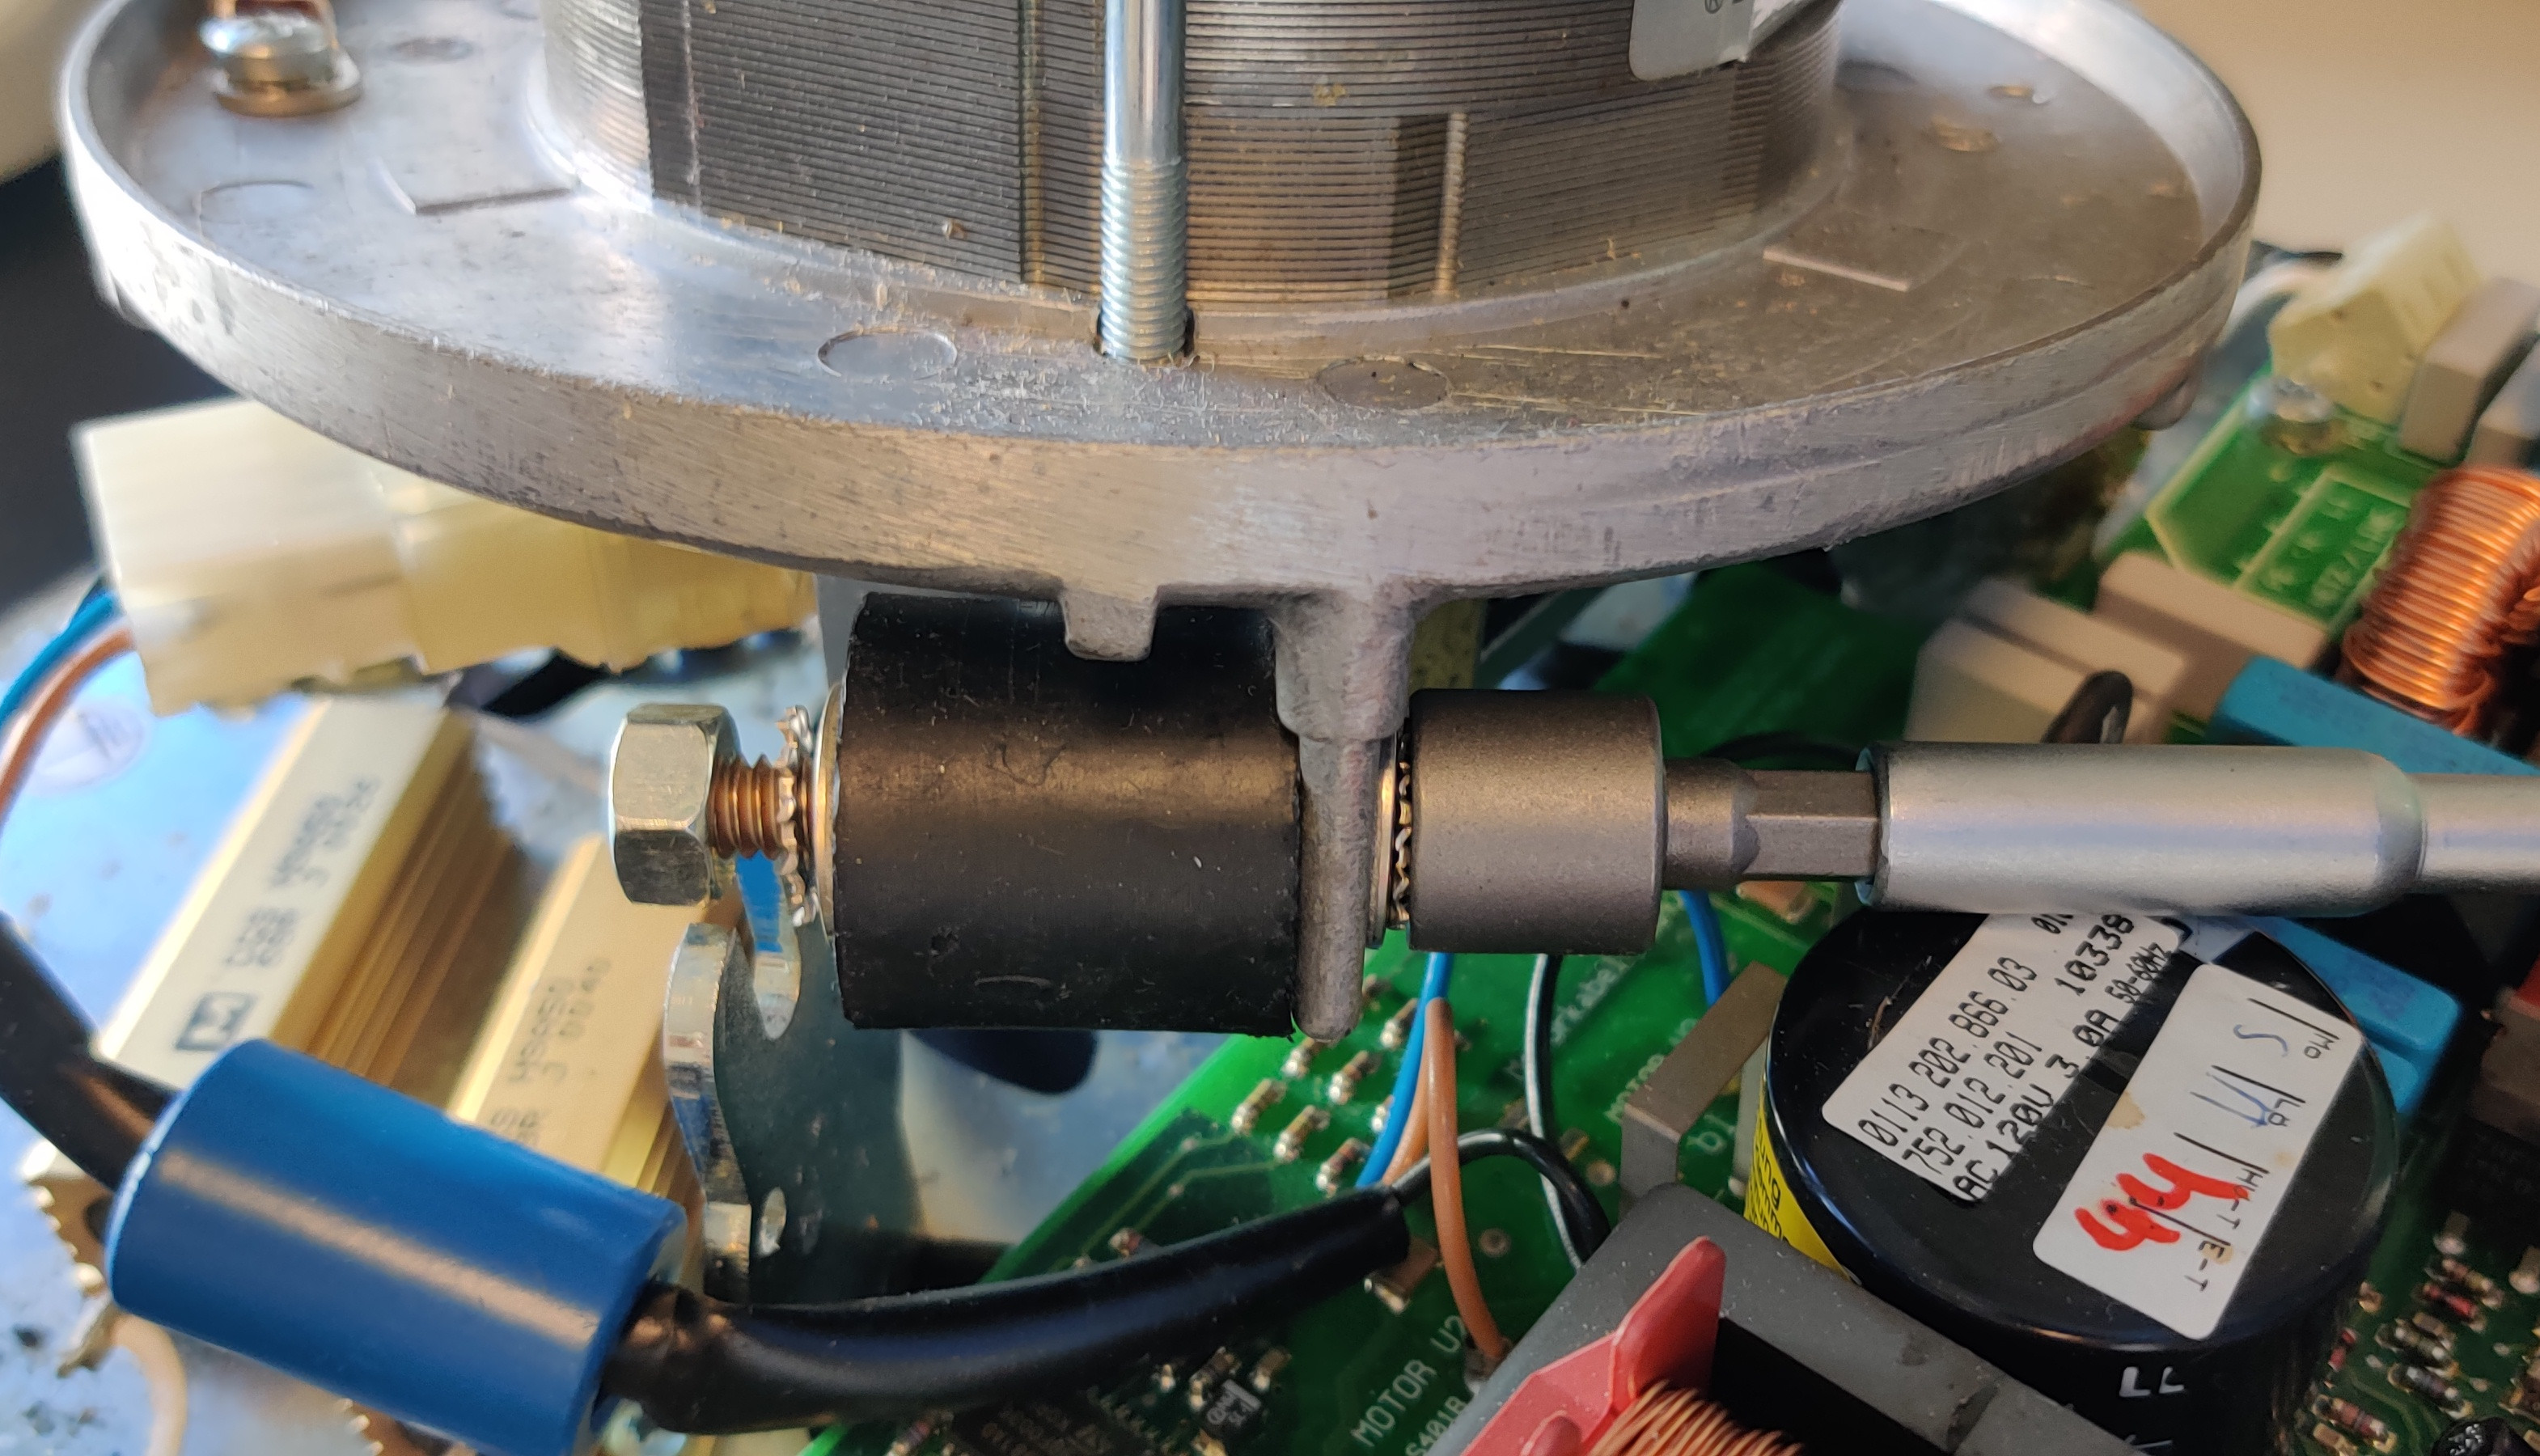
A mount half-replaced. You need to attach the mount into the two slots for it. It is likely easier to attach it to the rotor first, then attach it to the base.
Put the outer shell, side screws, and rotor back into place. Take care not to press down hard on the rotor as this can cause the rubber mounts to split.